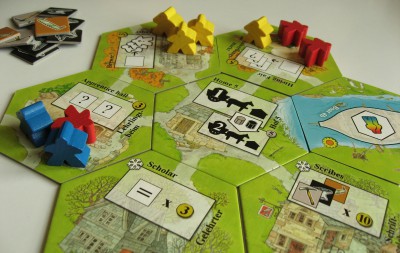
As Blue and Burgundy finished their dinner, everyone else arrived and we began the “Who wants to Play What” debate, and particularly, the “Who wants to play the “Feature Game” tonight” discussion. The “Feature Game” was to be Caverna: The Cave Farmers, a game that is so similar to Agricola, that it is often referred to as “Agricola 2.0”. In Agricola, the idea of the game is that players start with two farmers, a large field and a wooden hut and try to build a farm, by planting wheat and vegetables, buying and breeding animals, extending and upgrading their hut, and expanding their family. It is a worker placement game which takes place over a set number of rounds and in each one, each family member takes one action. The actions that are available are very limited at first, but more are added as the game progresses.
/pic1820952.jpg) |
| – Image by BGG contributor MisterC |
There are three main differences between the Caverna and Agricola, and the first (and most obvious) is the theme. Instead for medieval farmers, players are dwarves living in the mountains, building a dwarfish community with dogs and donkeys. This means players are developing their cave system (rather than their hut) and cultivating forest land rather than pasture. The game play is very similar though with players taking it in turns to place one of the dwarves from their community on one of the action spaces and then carrying out that action. Again during the game, the number of actions available increases. Many of the actions are different though as players cultivate the forest in front of their cave and dig into the mountain, furnishing caves for their clan as well as mining for ore or ruby. This leads to another obvious differences: Expeditions. In order to go on expeditions dwarves need ore to forge weapons, and the better armed the dwarf, the more exciting the adventures they can go on and the better the rewards.
/pic1993167.jpg) |
| – Image by BGG contributor saksi |
These features are largely cosmetic though, and the real differences are in the game play. In the advanced game of Agricola, each player is dealt a hand of fourteen cards at the start, which are used to add variety and interest to the game. There are hundreds of possible cards available and players can either choose from their starting hand, or to make the game fairer, they can be drafted. The problem with this is that for players who are unfamiliar with the game, choosing which cards might be useful or will work together is a very painful process. In Caverna, the depth is introduced by the addition of forty-eight different buildings tiles which laid out so players can see what the options are throughout the game. Critically, there is one set of tiles and they are all used in the advanced game. This means Caverna doesn’t have the infinite variety of Agricola, but the buildings deliver a more balanced game with a lot of options that are available every time.
/pic1993165.jpg) |
| – Image by BGG contributor saksi |
The games also feel very different: with Agricola the game is always a struggle, with players fighting to balance feeding the family and developing the farm. At the end of the game, a large proportion of players scores come from fulfilling a checklist of animals and vegetables. This means that there are one or two main strategies and successful players are generally those who are most efficient in these. In Caverna, there is more variety in the strategies available, but without the feeding mechanism and associated peril of starvation, there is a lot less stress in the game. All in all, it is generally a lot easier to build a productive engine and more difficult to make a total mess of it in Caverna, while still providing a lot of the same sort of challenges.
/pic2516863.jpg) |
| – Image by BGG contributor haslo |
Both Agricola and Caverna take up a lot of table space and a while to set up. As Ivory had never played it before, and even Burgundy, Magenta and Green had not played it in nearly four years, we decided to play the introductory game. It turned out that this was just as well, as it still took the best part of three hours to play. By random selection Burgundy got to go first and effectively choose his own strategy, while Green went last and was more or less forced to let his strategy be dictated by what was left over. The first few turns were the inevitable resource grab—anything and everything that players could get hold of. Being a cave based game, stone and ore were particularly popular to such an extent that Green found he was struggling to get any by the time his turn came round, which pushed him towards a more Agricola-style farming strategy.
/pic2521029.jpg) |
| – Image by BGG contributor haslo |
Although Magenta had played Caverna once before she had little recollection of it as it had been at 3am one Christmas Holiday. As a result, the game was all a bit of a mystery at the start. Nevertheless, she got into sheep farming early, but did not neglect her mountain either, regularly chipping away giving her ample opportunities for rooms and mines. She was struggling outside though: she managed to get some more animals, but couldn’t get the pastures to keep them in, and without crops she was constantly struggling for food. She was able to build an oven, but this meant that as fast as her flock grew she had to slaughter them to keep her hungry dwarves fed. With her lack of outdoor enclosures though, this might actually have been a help. In the end, it was her mining and interiors that helped give her the best scores and she did eventually manage to cover her whole player board by the end of the game to avoid negative points.
/pic2516862.jpg) |
| – Image by BGG contributor haslo |
Ivory and Green were the first to grow their families and, fed up with being last in the turn order, Green used his larger family to good effect and nabbed the start player marker. So the very next turn he was able to grab a wheat and veg while planting a field and pasture at the same time. Then, with his second dwarf he immediately planted another field and pasture to plant that self same wheat and veg, and thus started his crops growing. He then supplemented this with an improvement tile which enabled him to convert a wheat and a veg into five food which meant he was never short of food to feed his family and was free to expand whenever he was able to mine the mountain and build extra rooms. With crops aplenty, he then set about acquiring animals and fencing in fields, leaving his mining for the last few turns in a frantic dash to increase his final score.
/pic1993163.jpg) |
| – Image by BGG contributor saksi |
Burgundy and Ivory, both decided to bet heavily on arming their dwarves and sending them on expeditions to bring back lots of exciting goodies. Several times, Ivory exchanged a precious ruby to play his fighting dwarf out of turn and grab the four-goods expedition before Burgundy could. This strategy served them both well, especially as they were able to keep mining in order to locate more and more ore to help weaponise more dwarves. Burgundy held on to his gems and managed to build a special room to help them score him more points. He also managed to also cover his whole area and “discovered” two ruby mines. Ivory neglected his farming and failed to plant anything till right at the end of the game. Ultimately, that counted against him as he was left him with empty spaces that lost him six points.
/pic1993166.jpg) |
| – Image by BGG contributor saksi |
The last two harvests were both interrupted by the special tiles which caused everyone a few problems and in the end it was really quite close. It was Burgundy who took the glory though, a handful of points ahead of Green who was a single point ahead of Ivory. It was a good game though and everyone enjoyed it—Burgundy professed to prefer it over Agricola too, a game where he reckons he always struggles to do well in. Meanwhile, the next table started with a big debate about what to play. Several games were considered, but Black made the mistake of mentioning Keyflower, which is one of Blue’s favourites and thereafter, there was only one game she wanted to play. Other games were suggested, but for the most part, there was a good reason why these were not ideal, and, in the end, Black pointed out Blue’s interest in Keyflower, and everyone else agreed to play it.
 |
| – Image by boardGOATS |
Everyone had played the game before, but it was a while ago and Pine had little recollection, so a rules run-through was necessary first. The rules of the game are not terribly difficult to understand, but combine to make a complex game. Played over four rounds (or Seasons), players bid on hexagonal tiles which are added to the winners’ village at the end of the round. Bidding is carried out with coloured meeples (or Keyples as they are known in this game), and counter-bids must follow colour, usually red, blue or yellow. Most tiles are action spaces, so as well as currency for bidding, Keyples can also be used to activate spaces. Any space can be activated at any time by any player when they place one of their Keyples on a tile, any tile, one in their own village, one in someone else’s, one still being auctioned. At the end of the round, Keyples used in winning bids are lost, while those involved in losing bids return to their owners and any used to activate tiles are adopted by the tile owners.
/pic2266913.jpg) |
| – Image used with permission of BGG contributor punkin312 |
Essentially, that is really all there is to the game, but there are lots of consequences of this simple mechanism and a lot of complexity underlies what players can do with the actions on the tiles. In Spring, most of the tiles available provide resources of some description, in Summer there are more advanced resource and related tiles, while in Autumn the first of the scoring tiles arrive. The majority of the scoring comes from the Winter tiles though, and these are selected by the players, who are dealt a small number at the start of the game and choose which to introduce at the start of the final round. This is particularly clever as it provides players with possible strategies if they choose to follow them. Invariably, though, the best laid plans go completely awry and players are left choosing which of their tiles will be the least useful to their opponents and hope that others will be forced to play something more helpful.
/pic2266910.jpg) |
| – Image used with permission of BGG contributor punkin312 |
Once we’d run through the rules, we laid out the Spring tiles and began. Keyflower plays two to six players and unusually, it plays well acrioss the whole range, but is different at each number due to the fact that different numbers of tiles are used during the game. With two players nearly half the possible tiles are removed from play, so the game becomes very tactical rewarding players who can keep their options open and change their plans like a politician changes policy, when they find the tiles they need are not available. With six players, all the tiles are available, however, with so many opponents lots of competition is guaranteed. Black pointed out that Keyflower is particurly good with four though as almost all tiles are in play, and there is lots of competition as well.
/pic2266911.jpg) |
| – Image used with permission of BGG contributor punkin312 |
There are other consequences of changes in player number. For example, at the start of each Season, ships arrive delivering Keyples and Skill tiles; players bid to have first choice of these. The number of arrivals is dependent on the number of players, however, no matter how many arrive it is never enough, worse, as the game year progresses the number of Keyples arriving steadily decreases. This is because players are spending less on buying tiles and instead are reusing workers that have been activating tiles. Regardless, having a means to get extra Keyples is invaluable and it was with this in mind that Black began bidding for the Ale House. This tile generates another Keyple, each time it is activated, two once it has been upgraded. Largely on the principle that if someone else wants something, they should not be allowed to have it, Blue started a bidding war.
/pic2266915.jpg) |
| – Image used with permission of BGG contributor punkin312 |
Unfortunately for her, Blue won, but at a cost. This was very much counter to her usual strategy, as she usually avoids overpaying at all costs, often leaving her with the fewest tiles at the end of Spring, sometimes none at all. Pine on the other hand, fancied the Pedlar, a tile that turned yellow Keyples into green ones, and green ones are Special. Green Keyples behave in exactly the same way as red, yellow and blue Keyples, except there are none in the game at the start so their extreme scarcity means they are very powerful, especially when bidding. Pine also went for gold and Purple took the Keywood, which gave her substantial wood producing capability and the Workshop which allowed her to produce any resources she wanted.
/pic2266912.jpg) |
| – Image used with permission of BGG contributor punkin312 |
Summer and Autumn proceeded in a similar fashion, except that everyone started out much more careful with their Keyples, which meant everyone ended Summer with lots of stuff they didn’t want. Black finally got his Keyple generating tile when he took the Brewer, however, that needed Skill Tiles and he didn’t have a source of them. Blue was worse off finishing Summer with a random assortment of boat tiles she didn’t really need. Pine and Purple did slightly better, taking tiles that convert Skills into resources and transport/upgrade tiles and adding to their gold producing ability. Autumn saw the advent of round two of the bidding war when Blue started bidding for the Sculptor and Sawmill and Black decided to join in. It ended with honours even, but there was more to follow.
/pic2266916.jpg) |
| – Image used with permission of BGG contributor punkin312 |
In the final round, some of the strategies became clearer, when the Jeweler, Craftsman’s Guild and the Windmill appeared. Everyone was hustling for the tiles they wanted, trying to maximise their points for the end of the game. It was then that Black finally finished the bidding war, taking the Sea Breese boat tile, which gave him only one point, but cost Blue nearly twenty points. Pine who had struggled throughout the game suddenly found he had lots of points, sixty in total, just two behind Black who finished in first place, thanks largely to the vast number of Keyples he finished with. On the next table, Caverna still had some way to go and there was still time for one more game, so Pine dipped into Burgundy’s back and brought out Splendor—at least with Burgundy occupied elsewhere, everyone else had a chance of winning for a change…
/pic2026082.jpg) |
| – Image used with permission of boardgamephotos |
We’ve played Splendor a lot within the group, an awful lot, and have just begun exploring the Cities of Splendor expansion, but after the last game, everyone wanted something they were very familiar with, so we stuck to the base game. And it is a simple game of chip collecting and engine-building with a very loose gemstone theme. Basically, on their turn, players can take gemstone poker chips, or use chips to buy a card. Some cards have points on them and all can be used like the poker chips to buy cards (but without having to return them). The cards also give players access to “Noble tiles” which also give points. The winner is the player with the most points after someone reaches fifteen points.
/pic2026081.jpg) |
| – Image used with permission of boardgamephotos |
The game play was very unusual this time, because the black Opals came out very late, and on the odd occasion that they did appear Blue pounced on them and immediately reserved them. This had two effects as it both prevented anyone else from getting them and also ensured that she had a plan each time she had to pick up gemstone poker chips. The problem was made worse by the fact that three of the Nobles required Opals. With the strangle-hold she had on the game, it was not surprising that she was the only one to get any Nobles and quickly brought the game to an end finishing with eighteen points, well clear of Pine in second place.
/pic2026093.jpg) |
| – Image used with permission of boardgamephotos |
Learning Outcome: Sometimes winning a bid can be worse than losing.
