Tag Archives: Taluva

12th Movember 2024

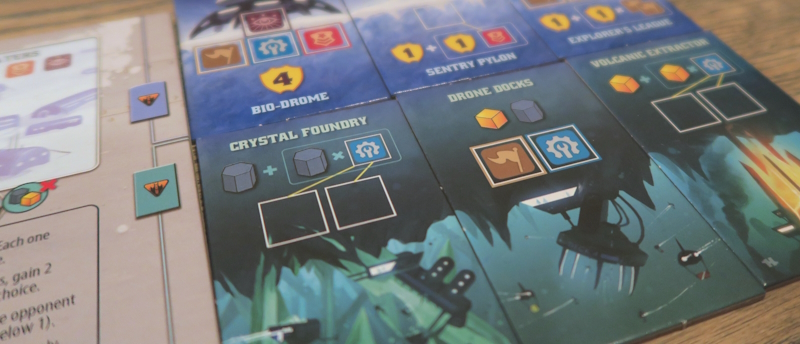
The evening began with Plum explaining the “Feature Game” to Indigo and Navy, despite the fact they had already decided they were unlikely to play it.  Still, there was time to fill as people finished eating and the stragglers, and that was as good a way as any.  The game in question was Underwater Cities, which is a sort of worker-placement and network-building game.  Although the game is quite complex, the underlying mechanism is quite simple:  players start their turn with a hand of three Cards and, on their turn choose an Action space and pay a Card to use it.  The Action spaces and the Cards come in three different colours, green, red and orange.

Underwater Cities
– Image by boardGOATS

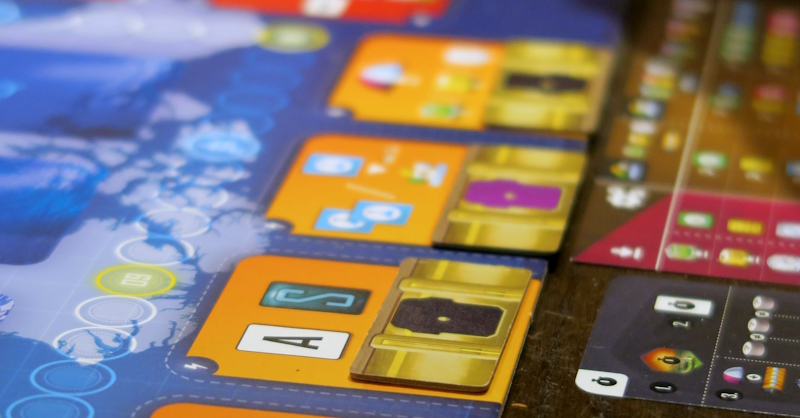
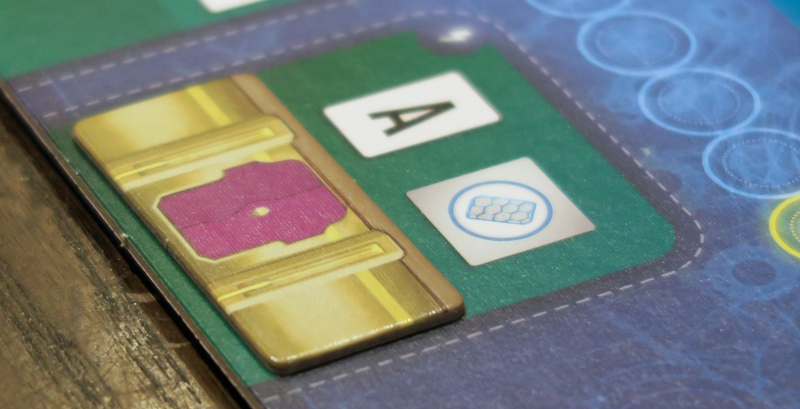
If the colour of the Card played matches the colour of the Action space chosen, then the player gets to activate the Card, most of which have an instant effect (though for some, the effect is delayed).  In general, the orange Action spaces are quite powerful and the green Action spaces are weak, whereas the green Cards have powerful effects and the orange cards are weaker, thus the Cards and Actions together are balanced.  Each Action space can only be activated by one person per round and the game takes place over ten rounds (though the group used the Quick Start variant from the New Discoveries expansion which replaces the first round) with each player taking three actions per round and production phases after the fourth, seventh and final rounds.

Underwater Cities
– Image by boardGOATS

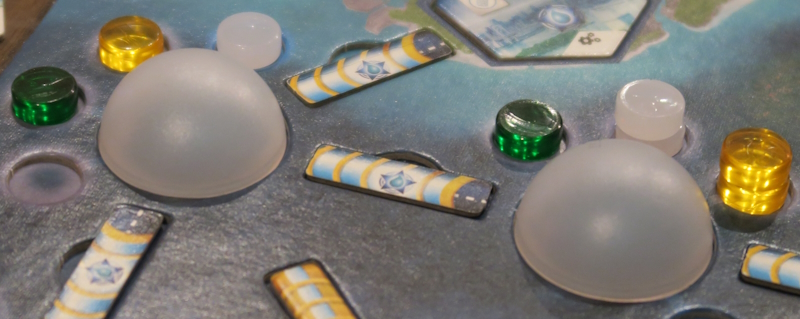
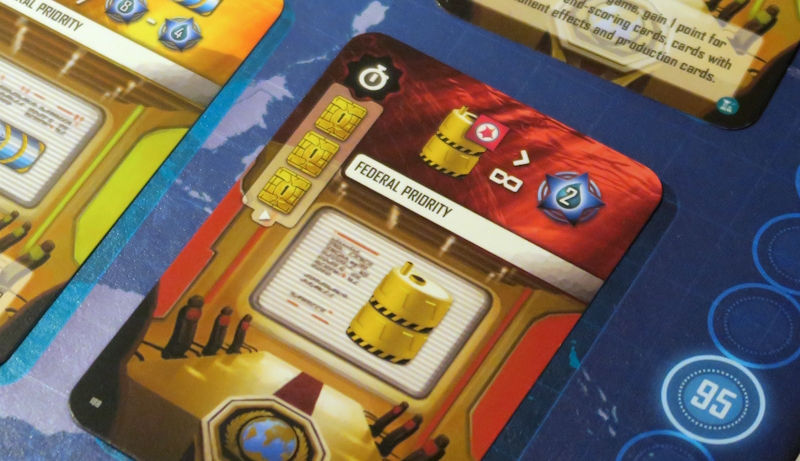
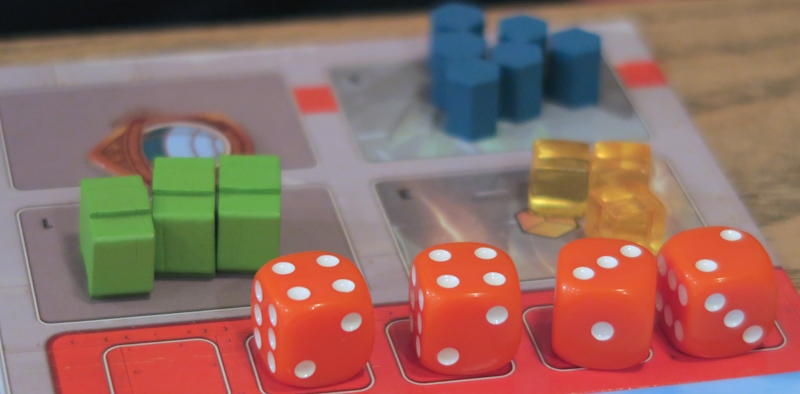
The aim of the game is to build a network on players’ personal player board, connecting Cities together with Tunnels and adding and Upgrading Buildings to provide production capabilities.  There are four Resources, Kelp, Steelplast, Science and Biomatter together with money, or Credits; these are produced by Farms (Kelp), Desalination plants (money) and Laboratories (Steelplast and Science).  Biomatter is essential for building symbiotic cities and can also be a universal building material (can be used instead of Kelp or Steelplast), but is a rare Resource that can only be acquired through Cards, Actions and by connecting some Metropolises to a player’s network.

Underwater Cities
– Image by boardGOATS

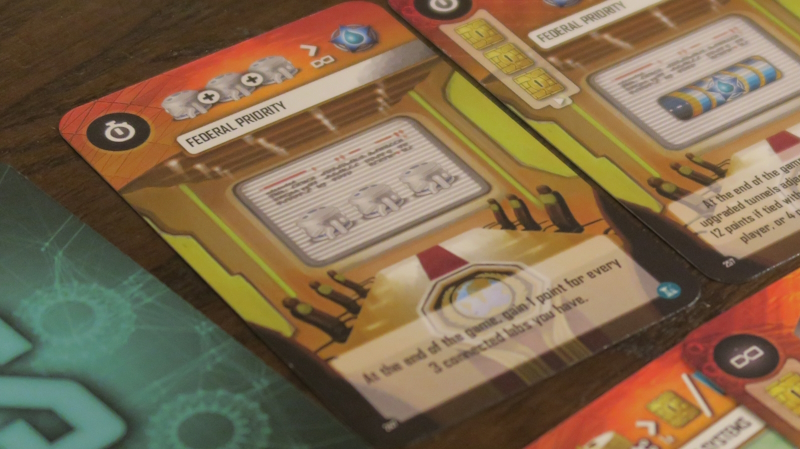
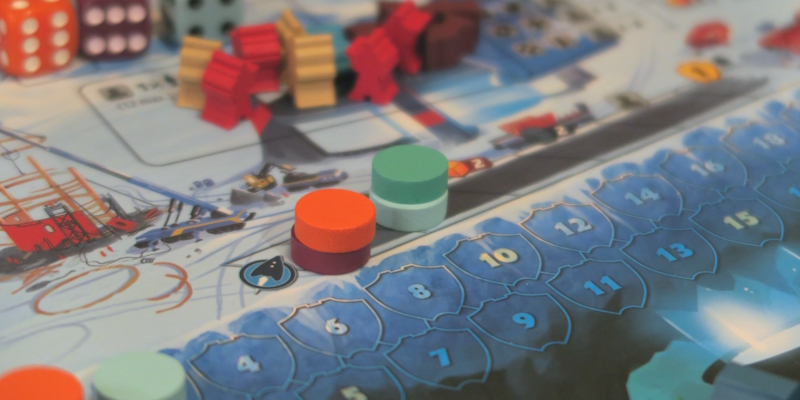
Players score points during the game and in the production phases after the fourth and seventh rounds, but most of the points are scored at the end of the game after the final production phase.  At this point, players score for the number of different Buildings next to each connected city in their network, for any end-game scoring cards, for their final scoring Metropolis and for any Resources they have left.  Indigo and Navy showed some appreciation as Plum explained, but ultimately decided it wasn’t for them, and were replaced by Cobalt and Ivory, both of whom had an idea of how the game played from watching run-through videos.

Underwater Cities
– Image by boardGOATS

The Quick Start gave everyone an Enhanced Assistant so Plum started with the ability to get Biomatter on production, so she was able to build purple Symbiotic Cities (which score more points) right from the beginning.  Cobalt’s also helped him when building Cities, giving him one Credit or Steelplast discount, although he didn’t really take advantage of this until the final Era. In contrast, Ivory focused on the end-game scoring from his Metropolis which required him to build seven Cities to get the maximum number of points.  By the first production phase, he had already built three and connected them to his network with Tunnels, but all those people needed a lot of feeding which was costly and slowed him down a lot.

Underwater Cities
– Image by boardGOATS

Plum focused on building a robust food engine with two upgraded green Buildings attached to one City (her end-game Metropolis also gave points for sets of upgraded structures) while Cobalt focused on getting his engine online and started on his objective to connect all his Metropolises and Cities with Tunnels in the second and third Eras.  He was aided by an ongoing ability that triggered whenever he used an Assistant (draw a Card and gain a Point), which he used heavily, getting four Assistants early in the game and activating them all in every Era. The extra Card draw ensured he was always able to play a matching coloured card with every Action which also helped.

Underwater Cities
– Image by boardGOATS

Plum pointed out that a friend who she plays with and often wins says, “Don’t always let me get the Special Cards—they are powerful!”  So after the first production phase, there was a focus on the special cards in middle, all of us grabbing some quite powerful abilities.  Ivory got an additional tile that gave him points every production phase and Plum got a heavily discounted City.  Cobalt’s engine was working very effectively by this time giving him lots of Resources and discounted Actions.  Despite her Special Cards, Plum was struggling as the main upgrade slot which she needed for her end-game Metropolis was denied to me when she had the Resources to use it.  Instead she ended up focusing on Symbiotic Cities and ended up with only the one regular City.

Underwater Cities
– Image by boardGOATS

After the second production phase, there was a big focus on how to maximize points. Ivory took a risk, taking the end game scoring card that gave twelve points for the player with the most upgraded Tunnels.  When he took it, he had the most upgraded Tunnels, but it was clear that Cobalt could challenge this.  Cobalt on the other hand had grabbed a couple of Special Cards giving three points per upgraded Tunnel plus one point per Card in his tableau.  For Ivory to score his Card it was critical that he denied Cobalt the ability to upgrade in the last turn and Ivory was able to make sure he took his first in the final round—this was fairly ironic as the majority of the rounds he had been the last player!

Underwater Cities
– Image by boardGOATS

This scuppered Cobalt’s plans and gave a twenty-four point swing in Ivory’s favour, but since he had increased his hand limit to four and was drawing multiple cards, he was able to pivot and build a City sharing two upgraded Farms and us Cards that provided points when played. This also produced quite a few resources in the final production phase.  Plum was struggling towards the end of the game as she couldn’t get the final Resources she needed to build the last two Tunnels to connect her end-game scoring Metropolis.  Despite it failing to score, it had still been a good focus for her game as the upgraded structures had given her extra production during the game and those Metropolis points would only be critical if the game was close.

Underwater Cities
– Image by boardGOATS

And close it was.  Plum had a slight lead going into the end game scoring and and-game scoring cards gave points fairly evenly too.  Cobalt and Ivory had the same number of Cities with three different Buildings, slightly more than Plum, but she more than made up for it with her Cities with her Cities with two different Buildings.  The Metropolis she failed to connect proved critical in her scoring though and although she just edged Ivory by two points, Cobalt ultimately took victory, also by just two points as he finished with ninety-seven.  It had been a very thinky game, and with three players was reasonably tight with people taking Actions others wanted.  It was very enjoyable when players were so evenly matched which was reflected in the scores despite very different strategies.

Underwater Cities
– Image by boardGOATS

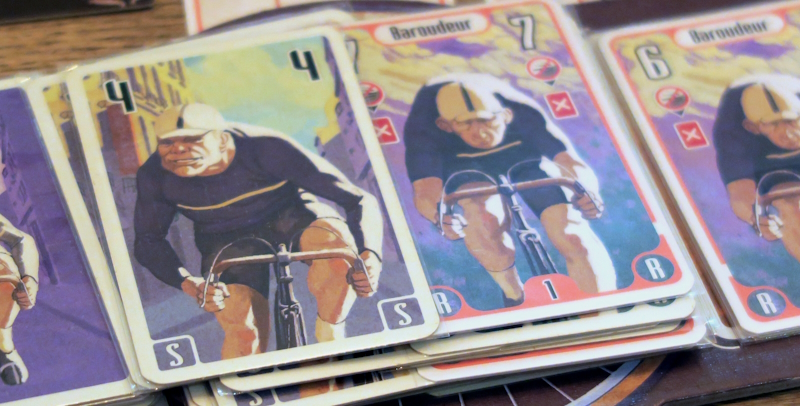
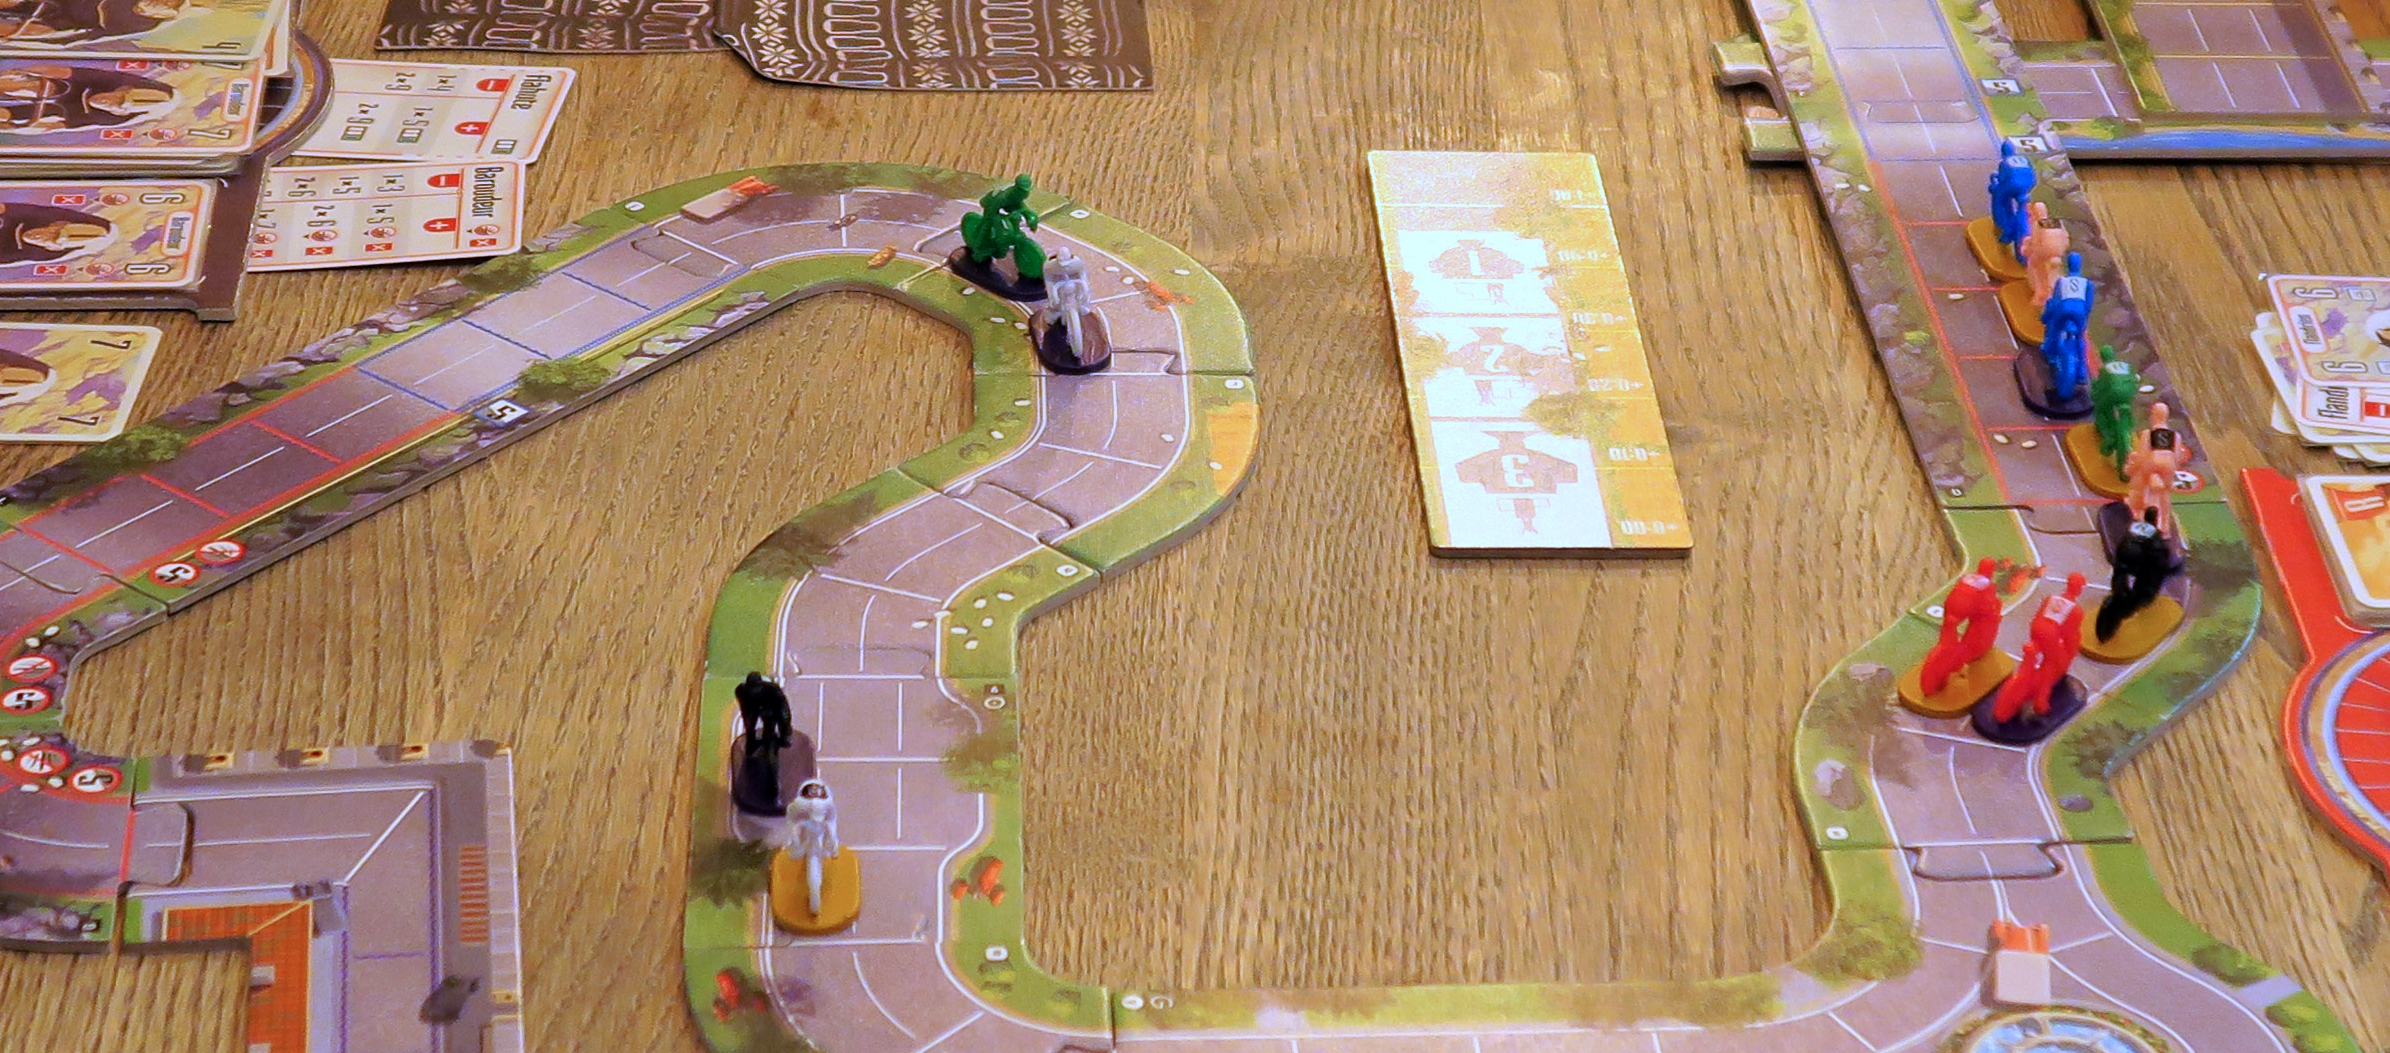
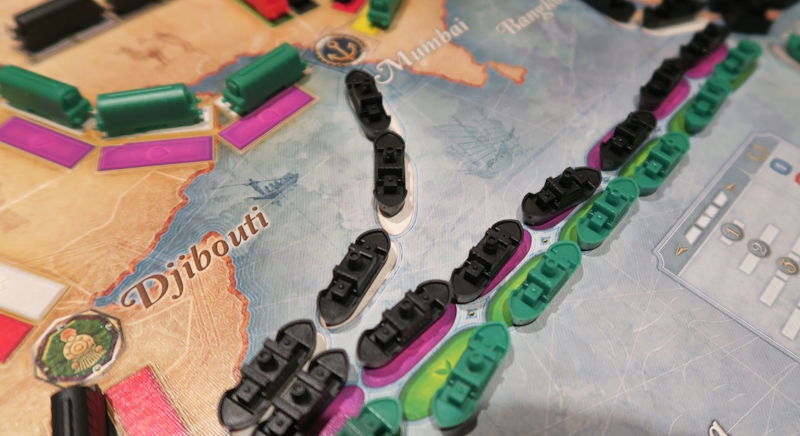
Black and Blue had been interested in joining the game of Underwater Cities, however, as it was, it was the last game to finish by some mile and would have taken a lot longer with a fourth player.  There wasn’t a sixth player interested in making a second game, so in the end, Black joined Pink who was very keen to give Teal’s new acquisition that he’d been toting about since Pink and Blue had brought it back from Essen for him.  This was the Grand Tour expansion to Flamme Rouge. This is a cycle racing game where players move their two riders forward by drawing and playing cards from that riders specific deck, depleting it as they go.

Flamme Rouge: Grand Tour
– Image by boardGOATS

As in real cycle races, players use slipstreaming to avoid exhaustion, in the game, these are cards that block up players’ hands making dealing with obstacles and moving through the peloton more challenging.  A large part of the new expansion is a campaign mode and there was only time for one game, however, there are some additional features, including some new hilly track and a double right-angle hairpin bend.  These added more interesting features to the parcours.  Like all race games, players usually do best if they can start fast and stay at the front of the pack.  In Flamme Rouge, this is mitigated by the fact that once a card is played it is discarded so players have to make their good cards last the duration of the race while avoiding too much exhaustion.

Flamme Rouge: Grand Tour
– Image by boardGOATS

Teal managed to crash both his bikes, while Black and Purple crashed one each.  Indigo and Navy led for most of the game while Pink tried to maintain a position in the front four or five.  Navy faded as the sprinters wound up for a lunge for the line, with Indigo as Marcel Kittel and Pink as Mark Cavendish.  This time, victory went to the German and the Manx Missile with just piped into second with Navy rolling home in third.  The game had been a lot of fun and the general consensus was that the Grand Tour expansion added some nice new features even when multiple games for a campaign weren’t appropriate.  It hadn’t out-stayed its welcome either, and although Teal headed home, there was time for everyone else to play one more quick game.

Flamme Rouge: Grand Tour
– Image by boardGOATS

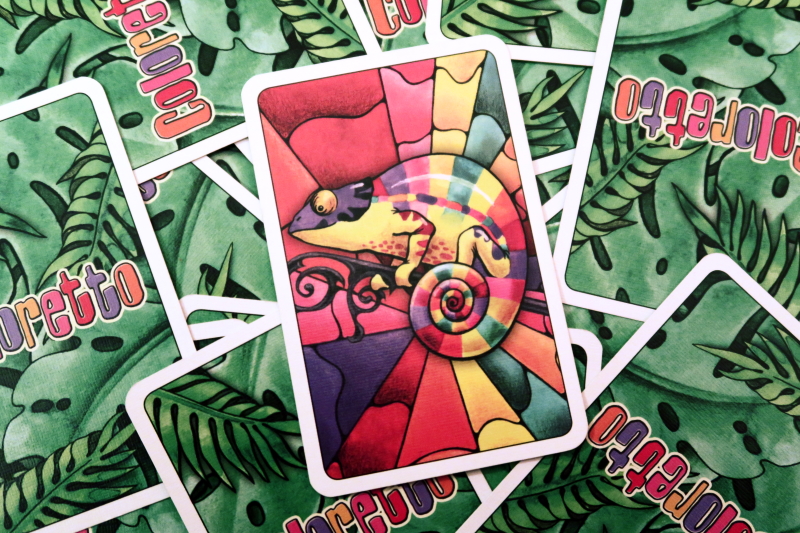
The game of choice was Coloretto—something of an old favourite.  This is a really quick game to teach and start playing, with players taking it in turns to either draw a card and add it to one of the trucks, or taking a truck and adding the Chameleons on it to their collection.  The clever part is that largest three sets score positive points following the Triangular series, while any other sets score negative points.  Purple drew the Golden Joker which was picked up by Pink, while Black took the other Joker.  The game was really tight, well, amongst the top three anyhow.  Navy managed to only score positive points, but his thirty-four points was one less than Indigo who took second and who, in turn, scored one point less than the victor, Black.

Coloretto
– Image by boardGOATS

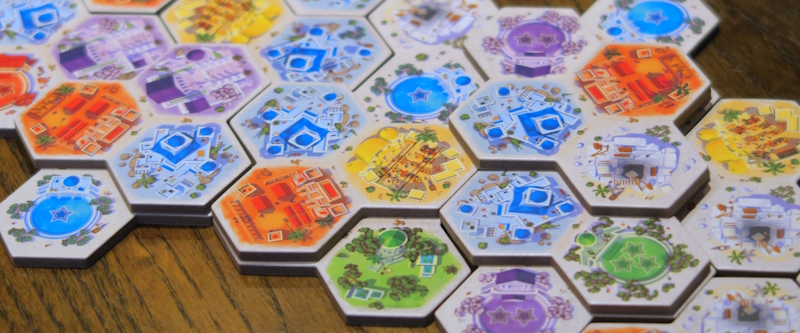
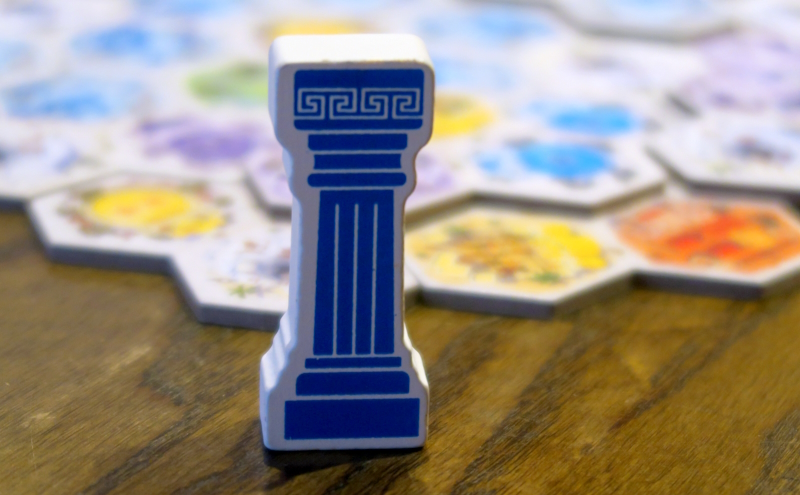
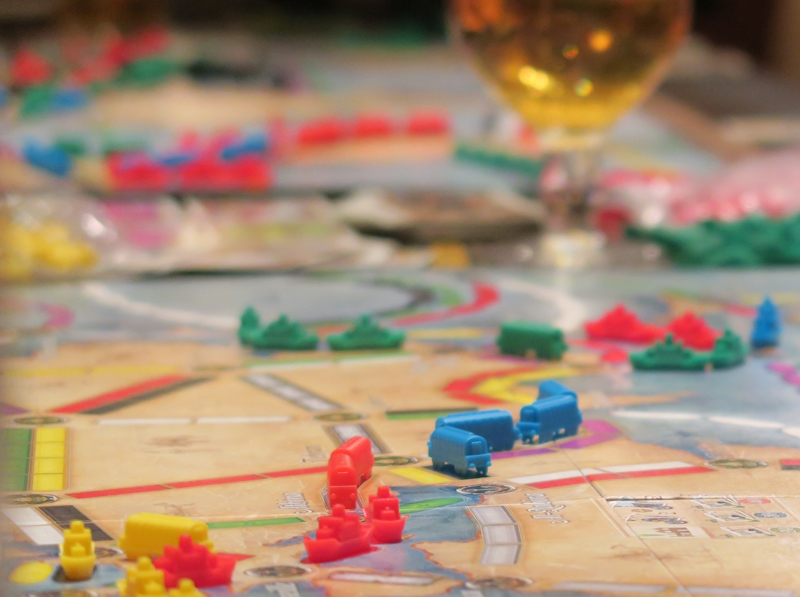
The final table consisted of Pine, Blue, Jade and Sapphire.  After a bit of chit-chat, this group settled on playing Akropolis.  This is a fairly light abstract tile laying game in a similar vein to Taluva or NMBR 9, where tiles placed on higher levels score more points.  In this game, players take a tile from the Market and place it in their City.  The first tile in the market display is always free, the one after costs one stone (the only resource in the game) the next one two stone and so on.  The tiles comprise three conjoined hexes each either a Quarry (which provide Stone when built over), a Plaza, or a District tile.  Tiles can be placed on top of others, but must cover more than one other tile and cannot leave gaps.

Akropolis
– Image by boardGOATS

At the end of the game, tiles that meet the scoring requirements for that colour are multiplied by their height.  As in Kingdomino where the area is multiplied by the number of crowns in it, this District score in Akropolis is multiplied by the number of Plazas in that colour; these totals are added together to give a final total.  This time, Blue scored heavily for her Houses and although Jade almost matched her with his Barracks, he didn’t score much for anything else and Blue had picked up a lot of points for her Markets too.  Together these gave her a bit of a landslide with a total of one hundred and nineteen.  Sapphire and Pine that by the end they had got the hang of things, and fancied giving it another go.

Akropolis
– Image by boardGOATS

The game was punctuated by a discussion about orange juice and lemonade, which is apparently called a “Henry” in these parts though nobody but Jade was aware of it.  Pine commented that where he came from it was more likely to be used to order cocaine.  This time, Blue tried a totally different strategy this time focusing entirely on Houses.  Sapphire’s Markets gave him forty points and Pine’s gave him thirty-four.  These were dwarfed by Jade’s Gardens that gave him sixty points, but they all paled into insignificance compared to Blue’s Houses which gave her one hundred and eight.  Sadly though, with nothing else but a pile of rocks, this left her with exactly the same score as last time—and a tie with Jade, while Sapphire, the most improved player finished in third, just four points behind.

Akropolis
– Image by boardGOATS

Learning Outcome:  The underwater world has a lot of potential.

20th August 2024

Cobalt was first to arrive.  Pink and Blue weren’t far behind though, and had just ordered their supper when Indigo and her son Navy arrived followed by Jade and Sapphire, then Ivory, Purple, Black, Pine and Teal.  While the others chatted and got drinks, Cobalt began teaching Indigo and Navy Akropolis.  This is a quick little game where each player is building their own acropolis. On their turn, players first take a tile the market. The first tile in the market display is always free, the one after costs one stone (the only resource in the game) the next one two stone and so on.  The tiles comprise three conjoined hexes each either a Quarry (which provide Stone when built over), a Plaza, or a District tile.

Akropolis
– Image by boardGOATS

Plazas and District tiles are in different colours, representing Houses, Markets, Barracks, Temples and Gardens.  Tiles are freely added to the player’s display, either on the base layer or on top of other tiles, so long as any Districts meet the their conditions and as long as there is a matching Plaza present.  At the end of the game, players score for the largest District of each type—each visible hex scores a point for the level it is on (one point for the base layer, two for the first floor etc) multiplied by the number stars shown on the Plazas they have visible.  The game is a sort of cross between Taluva and Cascadia, taking the conjoined triple-hex tiles and layered stacking from Taluva and the tile-placement and individual tableau from Cascadia.

Akropolis
– Image by boardGOATS

The game was quite tight between Cobalt and Navy, but Navy had the edge, winning his first game in the group with a hundred and eighteen points to Cobalt’s hundred and five.  As the game came to an end, the rest of the group began trying to work out who was going to play what.  In the end, there were two groups setting up to play the “Feature Game” which was Ticket to Ride: Rails & Sails.  This is a variant of the popular train game, Ticket to Ride, but with a considerable step up in complexity. In the original game, players take it in turns to carry out one of three actions:  take train cards, pay train cards to claim Routes on the map by placing train pieces, or take Tickets.  Points are scored for claiming Routes and for successfully connecting the two places shown on their Tickets with negative points scored for failing to complete Tickets.

Ticket to Ride: Rails & Sails
– Image by boardGOATS

In Rails & Sails, however, players build two connected networks, one on land and one on sea covering the whole globe.  Players build these with two separate sets of train cards, giving them two hands to manage, making it a more complex version of the game.  In addition to the usual four possible actions, on their turn, players can also build a Harbour into a city that they have already claimed a route into. To do this, players spend two Train cards and two Ship cards that are all the same color and all have Harbour symbols on them.  At the end of the game, players gain points for each Ticket that lists their Harbour, with players scoring for each Harbour when more than one features on their Ticket.

Ticket to Ride: Rails & Sails
– Image by boardGOATS

Another thing that adds to the complexity is the tension between Ships and Trains:  at the start of the game, players have a set total number of Ship and Train pieces, and choose choose how many of each they will have.  During the game, instead of a normal turn, they can exchange Ship pieces for Trains or vice versa, but at a cost of one point per piece swapped.  There are two different maps in the game, one covering the Great Lakes, and the other covering the whole World—the total number of Ships/Trains players have depends on which of these is used.  This time, both groups used the World map.  In addition to these major rules changes, there are also a couple of minor tweaks.

Ticket to Ride: Rails & Sails
– Image by boardGOATS

For example, there are Double cards in the Ship deck, which allow players to place up to two Ships per card.  There are also Tour Tickets, which feature more than two destinations—these will score a higher number of points if the locations are connected in the right order (and of course, will score negatively if one of the destinations in not connected at all).  On the World map, there are Pair Routes too.  These require the player to place two train cards of the same colour per space, but the whole Route doesn’t have to be the same colour.  There are the usual Double Routes as well, which come into play with four or five players, and multi-colour “Wild” cards which can be used as either Ship or Train cards of any colour.

Ticket to Ride: Rails & Sails
– Image by boardGOATS

Jade, Ivory, Sapphire and Pine made up the first group.  In their game, Jade and Ivory started by focusing on Trains while Pine and Sapphire began with Ships giving them both taking an early lead with Ships generally giving more points. Sapphire went to the front and stayed there for the majority of the game.  There was an initial scrabble in Asia/south east Asia as well as along the east coast of north and central America, and apart from some early commitments from Pine and Sapphire in the latter, in general there was no major “blocking” and everyone at least tried to play nicely.  That said, by the end of the game the board was very congested, perhaps due to the wrap around nature where Routes could fall off one side and come back on on the other.

Ticket to Ride: Rails & Sails
– Image by boardGOATS

Ivory was the first to take more Tickets and it was some time before Jade joined him.  Ivory went for Tickets considerably more times than anyone else and by the end of the game, he had significantly more completed Tickets than anyone else, though his were of lower value.  Pine in particular started with much more ambitious Tickets and happily declared that he had finished his first ticket about half through the game.  That was until Jade pointed out a potential gap in his track which Pine then hurried to fill.  Sapphire was following a similar strategy to Pine with bigger, higher risk Tickets and also focused on long Routes (hence his throughout the game).  It looked like he was going to trigger the end the game, but in the end, that was Pine.

Ticket to Ride: Rails & Sails
– Image by boardGOATS

Jade and Ivory both had shorter scoring Routes, but with more Tickets, predominantly located in Asia, whereas Sapphire and Pine were mapping the rest of the World.  Everyone except Ivory had to take advantage of the Ships/Trains swap and although this cost points and a turn it didn’t feel like it had a large impact on the game.  Both Jade and Ivory had cards at the end allowing for a late grab of high scoring Shipping lanes, but the game ended a little early for Sapphire.  That said, everyone completed all their tickets, including a very complex and high scoring Tour Ticket.  Pine and Sapphire eschewed Harbours, while Jade built just one.  Ivory, on the other hand, went built all three in the south east, despite the fact they were challenging to place.

Ticket to Ride: Rails & Sails
– Image by boardGOATS

After placing the Ships/Trains and scoring the Tickets, the scores were fairly even, but those extra Harbours really made a difference.  Sapphire and Pine took a twelve point penalty for not having any while Jade picked up twelve (an eight point penalty for not using two and twenty points for having one Ticket ending in his Harbour.  Ivory, however, scored a massive ninety points from his, with each of his three Harbours having two of his Tickets finishing in them.  This ultimately give him a total of two hundred and seventy-five eighty-five more than Pine who took second place. On reflection, there was a minor rules malfunction—when the group recounted the Route scoring, they failed to take account of the penalties for swapping Ships for Trains, but this was only a handful of points and wouldn’t have affected the final standings.

Ticket to Ride: Rails & Sails
– Image by boardGOATS

The game on the next table was not as highly scoring, but there was still quite a large spread in the scores.  While Black reacquainted himself with the rules, the others chatted and counted pieces, eventually they got going though.  Pink started in Australia because he liked it there when he visited almost exactly a year ago.  Then, he traveled north to east Asia, visiting exotic places like Bancock, Jakarta, Hong Kong and Tokyo, before crossing the Pacific to Winnipeg.  As the game came to a close, he also traversed the south Pacific to Valparaiso and took the southern coastal route to Rio de Janeiro.  Black also more or less circumnavigated the globe traveling from the UK, east across Europe to Tehran then on to Mumbai.

Ticket to Ride: Rails & Sails
– Image by boardGOATS

From there, he crossed the Pacific to Lima from where he traveled north, around the top of South America also making it to Rio before crossing the  Atlantic to Cape Town.  Part of the reason for Black and Pink choice of Routed (aside from their Tickets of course) was the fact that Teal was monopolising the Atlantic crossings, making it no fewer than five times!  From his Atlantic ports, he spread into North America and across Africa to Dar es Salaam.  Purple in contrast, focused her efforts on a single extended trip across the USA, found one of the few Routes across the north Atlantic not taken by Teal, journeyed across Europe following Black through Iran to the far East.

Ticket to Ride: Rails & Sails
– Image by boardGOATS

There was an unfortunate “Rules malfunction” when it came to scoring Harbours, which would have had quite a large impact on the game, but as everyone played by the same rules, it was at least fair.  Instead of scoring for each Ticket into each Harbour, they simply scored ten points for their first Harbour, twenty for the second and so on.  With this scoring, Pink, with his eight completed Tickets was the victor with two hundred and five points, fifteen points ahead of Teal in second and Black in third.  Both groups had really enjoyed the longer and bigger challenge of Rails & Sails.  The mix of boat and train cards did cause more grumbling than usual about the wrong colours being available, especially when there was an imbalance in favour of trains over boats or vice versa, but that’s just Ticket to Ride.

Ticket to Ride: Rails & Sails
– Image by boardGOATS

Meanwhile, the remaining group of four, Cobalt, Indigo, Navy and Blue, should really have been playing Azul (!), but after some dithering, Cobalt encouraged them to try The Artemis Project.  This is a game where players are trying to develop colonies on Europa.  The idea is that players roll dice and place them on action spaces to carry out actions.  There are seven Regions and players take it in turns to place their dice in them.  They are: Basecamp, Vents, Quarry, Gantry, Doorstep and Outfitter. At Basecamp, players go on Expedition to earn Expedition Badges and other Rewards. These are a bit like the Quests in the game Lancaster, and like the Squires in that game, dice can be augmented by Colonists.

The Artemis Project
– Image by boardGOATS

Also similarly, Expeditions are unsuccessful if a certain number of pips isn’t reached, which leaves players without their desired Rewards. In such cases, players don’t come away with nothing, instead they move their Token along the Relief Track and pick up a lesser reward.  However, there is a fixed number of spaces available along the Relief Track for each person, so when they are gone, they are gone.  The Vents and the Quarry provide players with Energy and Minerals respectively.  The level of the action depends on the value of the dice, however, the dice are activated from the lowest to the highest.  So, for example, placing a high value die like a six, will yield six Minerals, but if there are only ten available and two other players place fives, these will be activated first leaving nothing.

The Artemis Project
– Image by boardGOATS

The Gantry provides Buildings, which provide players with long term benefits during the game and points towards the end of the game.  Players bid for these and if they win, they must pay the bid amount in Minerals (the value of dice placed), to build them.  Both the Doorstep and the Academy deal with Colonists.  The Doorstep provides players with Colonists, but like the Vents and the Quarry, players who bid high, go last and may not get what they want (or even anything) while the Academy allows players to upgrade their Colonists if required.  Finally, the Outfitter allows players to gain Toolkits which grease the wheels a little by allowing players to alter the values of their dice.  Once all the dice have been placed, these different Regions are activated in order.

The Artemis Project
– Image by boardGOATS

Thus, for example, Minerals collected can be used later in the same round to build Buildings, however, it is wise not to rely on that as another player can play a lower value die, easily scuppering plans.  In this way, the game can be quite aggressive with intentional and unintentional conflict when players get in each other’s way.  It is played over six rounds marked by Event cards associated with the Regions which are resolved before the relevant Region is activated.  At the end of the game, it is a bit of a “point salad” in that players score for left-over Energy and Minerals, for Fully Staffed Buildings, for the number of Buildings, for each complete set of four different Colonists, for any Colonists not part of a set, for Expedition Badges and for having the most unused Toolkits.

The Artemis Project
– Image by boardGOATS

Indigo clearly found the number of Regions a little bit bewildering and was keen to learn by playing, but The Artemis Project is not really a game that lends itself to that.  Indeed, in spite of understanding what each Region does, there is still an element of learning by playing in order to see how things fit together.  As the only one who had played it before, Cobalt stole a march by targeting the Basecamp early and grabbing one of the Expeditions, and because nobody joined him, taking both Rewards.  Navy opted for the sensible choice and went for Buildings in order to get an engine going.  Blue and Indigo weren’t so quick off the mark and took a little longer to work out how to put a strategy together.

The Artemis Project
– Image by boardGOATS

As the game progressed, Indigo became the Queen of the Resources gathering piles and pales, making god use of the multiplier tokens.  Blue made her way up the Relief Track after rolling some higher numbers and not using them well.  This was a problem made worse by Cobalt trying to muscle in on one of her Expeditions leaving her to walk away with nothing, leaving him with nothing too.  As the game came to a close, Navy had more buildings than anyone else and, as Blue and Cobalt both made a bit of a mess of things, he sailed gracefully into the lead finishing with sixty-eight points, while Blue just pipped Cobalt to second place.

The Artemis Project
– Image by boardGOATS

Learning Outcome:  Who needs Planes when you have Ships and Trains?

29th May 2018

Two of our more sporadic members arrived early and were keen to get as many games played as possible, so the first game was squeezed in between ordering food and its arrival.  As something quick was required and Turquoise hadn’t played it before, NMBR 9 was the perfect choice.  A quick rules explanation was necessary, but there isn’t much to explain so it didn’t take long:  one player turns over the card deck, one at a time and everyone takes the indicated card and adds it to their tableau, ensuring that the edge touches one of the other tiles.  Once a few tiles have been placed to form a base layer, then tiles can be placed on top of other tiles as long as there are no overhanging parts, and the tile sits squarely on more than one other tile; the higher the tiles are placed the more they score.  It was a  tight game, well, tight between three players, but Pink romped away with it, twenty points clear, thanks to building one more level than everyone else.

NMBR 9
– Image used with permission of BGG contributor punkin312

Food was a little delayed, so there was time for another short game, this time an old favourite, 6 Nimmt!.   This is a game that gives players the illusion of control while everything is going well, and then shatters that illusion when it all goes wrong.  It is one of those games that is more difficult to explain than to play, but essentially players simultaneously choose a card from their hand, then simultaneously, everyone reveals their card.  Beginning with the lowest, each card is added in turn to the end of one of the four rows of cards on the table.  If a card is the sixth to be placed in a row, the first five are “won” and the card becomes a new starting card.  The player with the fewest “nimmts” is the winner, though almost as much kudos goes to the person for whom the game goes most wrong  and ends up with the most “nimmts”.  As usual, we played two rounds, and Magenta won the first with a duck, while Purple top-scored with twenty-six.  Purple picked up more “nimmts” than anyone else in the second round too and bravely took the wooden spoon, but the winner is the lowest over two rounds, and when Magenta picked up thirteen in the second round, she left the door open for Turquoise who finished with a very creditable total of six.

– Image by boardGOATS

While Pink, Blue, Magenta and Turquoise munched their pizzas, and Burgundy was attacked his ham, egg and chips, there was just time for those not eating to play a quick game of Love Letter. This game is very, very simple and can be as long or as short as necessary, in fact we hardly ever actually play it to the bitter end (three wins for one person).  Players start with a one card in hand and, on their turn draw a second, then choose which to play.  Each card has a special action and the aim of the game is to be the last player remaining or, in the case of more than one player left standing, to finish with the highest value card.  The first round went to Ivory came out on top, but in the second, Green made a lucky guess and knocked out Ivory in the first turn.  Then Green lost on a comparison, leaving Black and Purple to battle it out to the last card, with Purple the victor.  The third (and as it turned out, final) round ended up in a very unusual situation of being a tie between Green and Purple who both had the same high card.  While checking the rules, Blue shouted across that the winner was the one who had the highest total in front of them, which gave victory to Green.  With one-a-piece (except for Black) it was declared a three-way tie, though Purple was able to claim a moral victory with one win and a lost tie-break.

Love Letter
– Image by boardGOATS

Burgundy was still wading through his ham, egg and chips, but everyone else was finished, so it was time to negotiate who was going to play the “Feature Game”.  This was to be Taluva, a game we’ve played before, but this time it was to include the Extension.  The base game is a fairly simple tile laying game with a surprising amount of depth.  The idea is that on their turn, players place their tile, then place a building then replenish their hand.  This procedure is to that of Carcassonne, but that is where the comparison ends.  The tiles are a strange dodecagon made of three hexagonal regions or fields, one of which is always a volcano.  When placing tiles, they can be adjacent or on top of other tiles so long as the volcano sits on top of another volcano (the tile must also cover more than one tile and there cannot be an overhang).  Buildings can be placed anywhere, provided that they obeys certain rules. Unfortunately, although the game is beautiful, the theme is a bit sparse making these rules appear very arbitrary which has the consequence that they are quite difficult to remember.

Taluva
– Image by boardGOATS

A hut can be built on any unoccupied level one terrain that isn’t a volcano. On the other hand, an existing settlement can be expanded by placing huts on all adjacent terrains of one type, with more huts placed on the higher levels (two on the level two etc.). There are also three temples and two towers to place which can only be added to existing settlements: temples must be added to settlements covering at least three fields, while towers must be placed on a level three field adjacent to a settlement of any size.  The game ends when there are no tiles left and the winner is the player to have placed the most temples at the end of the game. In case of a tie, the number of towers built counts and then the number of huts. However, if a player succeeds in building all buildings from two out of the three different types before the game end, then he immediately wins the game. On the other hand, any player who squanders his building pieces and is unable to build any more is immediately eliminated.

Taluva with Extension
– Image by boardGOATS

Adding the Extension adds four optional modules:  pieces for a fifth player; two ships per player; a small number of double-hex tiles (rather than triple-hex tiles), and a board that provides a boundary for the building area.  We added all four modules, though we used the largest boundary area so it had only a small impact on the game.  The double-hex tiles are laid out face up and each player can only use one during the game, but as all tiles must be used unless a player checks-out early, the decision when to take play one can be quite important as nobody wants to be left with a tile they can’t use effectively.  Perhaps the most interesting module, though, is the ships.  These are played on “lagoons”, but critically, there is  a limit of one ship per lagoon, and the ships do not connect other areas.

Taluva with Extension
– Image by boardGOATS

From the very start, everyone seemed to get carried away with the idea of trying to build lagoons and place their ships.  Everyone that is except Burgundy, who got his first settlement illegally removed by Blue and spent most of the rest of the game trying to catch up.  Meanwhile, Pink stalled as his computer overheated, trying to come up with a strategy to compete with Ivory’s ever-growing empire.  It quickly became apparent that it would require everyone else cooperating to bring it down.  Burgundy and Blue tried to hatch a plan, but Black couldn’t see a way to prevent Ivory placing his last ship, and wasn’t prepared to spend as long thinking about things as Pink.  And with that, Ivory brought the game to an end; definitely far more “thinky” than such a simple little game really had a right to be.

Taluva with Extension
– Image by boardGOATS

Meanwhile, those who did not want to play long or heavy games chose a light game of Best Tree House, an easy game to learn (or so we thought).  This is a fairly simple little card drafting game, but with the rules in German, it was down to Purple to try and remember how to play it and Magenta to attempt some translation.  Players start with a hand of six room cards, and simultaneously choose one to add to their tree, passing the rest of their hand on to their neighbour.  There are some rules about building: firstly, treehouses must be built in such a way that each new level has one more card than the last (giving the tree its shape).  Each card represents a type of room and these are colour-coded to one of six colours. When a player is adding a card of a colour they don’t have in their treehouse yet, it can go anywhere, but if a player is placing a colour that already exists in their treehouse, it must connect to at least one card of matching colour. In this way players have to consider their card placements over the course of the game and try to avoid locking themselves out of options as play develops.  The clever part is the Balance Marker which limits the placement options.  It has three positions and when it is not central, the player cannot build on that side of their treehouse, indeed, they have to build to the other side of center in order to move their Balance Marker back to open up their placement options again.

Best Treehouse Ever
– Image used with permission of
nonsensicalgamers.com

At the end of each round, players score their treehouse based on the trophies on display.  We stumbled through the first game not entirely sure who should chose the scoring alteration cards after each round.  It wasn’t till the end of the game, when Black had found a copy of the English rules online for us that we realised we had made a few mistakes in the way we played. Some of us had also re-used a colour that should not have been used as it had already been blocked by other rooms.  Although the game was a tie between Purple and Turquoise on thirty-four each, we felt we had made such a mess of it that we needed to try again, but properly this time—it was only a short game after all.  The second time round, the game made more sense and everyone made better choices. The choosing of the score alteration cards was certainly trickier this time, but that felt more like a game challenge.  This time the victory went to Magenta, but everyone felt better after the second try and the game seemed a lot fairer too.

Best Treehouse Ever
– Image used with permission of nonsensicalgamers.com

Although time was getting on, it still wasn’t that late, and the “Feature Game” looked like it might be drawing to a close soon, therefore we picked another short one, Dodekka.  This is a simple little push-your-luck card game, with five different suits, Fire, Earth, Air, Water or Ether each with cards numbered 0-4. The game starts with three random cards placed in a line from the draw deck.  On a player’s turn they can either take a card from the deck and add it to the end of the row of cards, or take the card nearest the deck.  If the total of the face values of the cards in the row exceeds twelve, then the player has to take the whole row.  At the end of the game, players choose a scoring suit and add up the face value for that colour, then they subtract the penalty points – one for every card not in their scoring suit.  Purple and Green are old hands at this one, but Turquoise and Magenta had not played it before. Green made a good show of demonstrating how not to play this game as he managed to collect a vast array of cards of all colours.  His positive score was not bad, but he had a shockingly high negative score giving an overall minus one.

Dodekka
– Image by boardGOATS

It was much closer between the other three.  Turquoise got to grips with the idea quite quickly and managed to amass a high positive score of 16, but ended up with a few too many other colours.  In a game that is often won with a score of two or three, her score of nine was excellent and remarkably tied with Purple who scored.  Eclipsing them both, however, was Magenta, who scored positive thirteen like Purple, but amazingly had avoided the traps and ended up with only two other cards to give an unheard-of total score of eleven.  By this time, Taluva had finished, and that group had moved onto another quick game that we’ve not played for a while, The Game.  This was played with the blue cards from The Game: Extreme, but we just ignored the additional extra icons.  In this game, players must try to cooperatively play every card from the deck (numbered two to ninety-nine) onto four piles.  On their turn, the active player must play two cards from their hand on any of the four piles:  for two of the card must be of higher value than the current top card, while for the other two it must must be of lower value.

The Game: Extreme
– Image by boardGOATS

Players can discuss anything they like so long as nobody discloses any specific number information and they can play as many cards as they like on their turn so long as they play at least two (until the deck has been depleted, after which they must play one).  To help eveyone out, there is also the so called “Backwards Rule” which allows players to push a pile back so long as the difference between the card they are playing and the card they are covering is exactly ten.  Once the active player has played their cards, they replenish the missing cards.  The game ends when all cards have been played or the active player is unable to play a card.  This time, a lot of players started with mid-range cards, but once those had been cleared, things progressed quite satisfactorily.  Inevitably, when Burgundy was forced to trash a pile, things began to go wrong, but once he’d played all his cards, with a bit of careful organisation all of a sudden it looked possible, and indeed, as Ivory played his last cards, a four and a three, we beat The Game for the first time in a very long while.

The Game: Extreme
– Image by boardGOATS

While all this excitement was going on, Green had left for an early night and the last three decided to give NMBR 9 another go.  This time, all three players only managed two scoring layers, and, as a result, there was just one point between second and third.  It was Turquoise, however, who had really got a handle on the game this time though, and finished more than ten points ahead of the others with a creditable score of sixty-four.  There was still time left for something shortish, and with six people there wasn’t an awful lot to choose from, so in the end, we went for an old favourite, Bohnanza, also known as “The Bean Game”.  Because most people have played this a lot, in general, it was only a few minor points that really needed clarifying though reminders are always helpful:  hands must NOT be rearranged; active players MUST play the first card from hand and may play the second; the two cards turned over from the deck must be planted before any other trading can be done; fields with only one bean in them cannot be harvested unless all fields only have one bean in them; draw FOUR cards at the end of players turns, and third bean fields cost only TWO coins…

Bohnanza
– Image by boardGOATS

The game was very close.  Purple was clearly doing well with lots of lucrative Soy beans, while Black-eye beans were unusually popular.  Black was stuck with a precession of coffee and wax beans, while Blue kept digging up stuff just before she acquired more of them. Burgundy kept complaining that he had a very small pile, but by the end it looked just as healthy as anyone else’s.  Blue bought herself a third bean field at her first opportunity, and, controversially, Ivory followed about two thirds of the way through the second round.  This drew lots of surprised gasps and sucking of teeth, as the received wisdom is that with large numbers of players, the extra field is rarely worth it.  It was impossible to tell whether Ivory would have done better without it, but it was a game of small margins.  In the end, it was a tie, with Blue and Purple both finishing with thirteen points, largely thanks to a very dodgy trade on the final turn.

Bohnanza
– Image used with permission of BGG contributor spearjr

Learning Outcome:  Great games can come from a simple rule set.

10th February 2015

Getting into the mood for Saturday (St. Valentine’s Day), we started out with just a couple of quick hands of the old favourite, Love Letter.  Blue took the first hand and Grey the second, however, we were still expecting a few more, so we decided to play another quick game and after a little discussion, we went for Coup.

Love Letter
– Image used with permission of BGG contributor henk.rolleman

This is a light little card game with a lot of similarities to Mascarade, which we played last time:  on their turn, players declare they are going to take an action and other players can either claim they are a specific character and counter or challenge the active player to prove that they are who they say they are.  Basically, the actions are either: take money in various different amounts (with different risks); spend money to assassinate or perform a coup, or trade a card with the deck.  Players have two character cards face down in front of them, and when challenged correctly or assassinated/subjected to a coup, they turn one face up.  When both of a player’s cards are face up, they are out;  the winner is the last man standing.

Coup
– Image by BGG contributor jerome75

Unfortunately, Blue, who had played it quite a bit in the past got horribly muddled with the rules, largely due to the similarity between this and Mascarade, so consequently, forgot a small but quite critical rule:  when a challenge is made and the challenge is unsuccessful, the player should exchange their card with one from the deck.  Although this obviously had an impact, since everyone was playing by the same rules, it wasn’t too drastic.

Coup
– Image used with permission of BGG reviewer EndersGame

Before long, Cerise and Grey were outed as Dukes and Indigo was claiming to be a Captain and was stealing from Cerise.  “Burgundy the Brave” kept challenging, but unfortunately was wrong more than right and was soon out of the game.  When Cerise claimed to be the yet another Duke nobody believed her.  Meanwhile, Indigo was building up quite a store of cash, so Green decided it was imperative that her money supply should be cut off and assassinated Cerise proving that she had been holding two Dukes at the start.  Green’s unsuccessful attempt to assassinate Blue (who was the Contessa) left just Indigo, Grey and Blue in the game.  Indigo’s successful coup was rewarded by a prompt assassination of her final character by Blue, leaving just Blue and Grey.  Grey, as a captain was trying to collect enough money for a coup, while Blue needed just one more coin for the assassination.  So, Blue kept taking two coins in Foreign Aid and Grey immediately stole them.   It looked like Grey had it, but since Blue still had two character cards, that gave her an extra chance to collect money the game ended when she mercilessly stabbed Grey’s captain in the back.

Takenoko
– Image used with permission of BGG contributor nad24
and nonsensicalgamers.com

We then split into two groups with the first playing the “Feature Game”, Takenoko.  The back-story for this game is that a long time ago, the Chinese Emperor offered a giant panda bear as a symbol of peace to the Japanese Emperor.  Since then, the Japanese Emperor has entrusted the members of his court (the players) with the difficult task of caring for the animal by tending to his bamboo garden.  So the players have to cultivate the different plots of land, irrigate them and grow one of the three species of bamboo (Green, Yellow and Pink) with the help of the Imperial Gardener.  The winner is the player who grows the most bamboo, managing his land plots best while feeding the Panda.

Takenoko
– Image by BGG contributor woodenbricks

The play area starts with one single hexagonal “pond” tile with two characters on top:  the Imperial Gardener and the Panda.  On their turns players first determine the weather, then perform their actions.  The weather is determined by a roll of the weather die, which give the active player some sort of bonus.  For example, when the sun shines, the payer gets an extra action, and rain stimulates the bamboo of their choice to grow.

Takenoko
– Image used with permission of BGG contributor Oceluna

Once the weather has been determined, the player can perform two actions.  These must be different and the player can choose freely from the five available.  Firstly, the player can add a new bamboo plot, by drawing three hexagonal tiles from the face down stack and choosing one to place.  This tile must be placed next to the starting “pond” tile or adjacent to two plots already in play.  There are also “improvements” which are sometimes built into the plot, but can also be obtained by rolling the weather die and can be played at any time.  The second option is to take an irrigation channel.  These can be played straight away or stored for later use, but bamboo only grows on irrigated plots.  The main way to irrigate a plot is by connecting them to the pond via channels.

Takenoko
– Image by BGG contributor woodenbricks

Alternatively, a player can move one of the characters, either the Imperial Gardener or the Panda.  Both move over any number of plots, in a straight line, but when they reach their destination, their action is different.  The Panda cannot resist bamboo, so will eat one segment of bamboo from the plot he lands on (the pieces are stored on the player’s individual board); the Imperial Gardener encourages the bamboo to grow, and the bamboo on the plot he lands on grows by one segment as does every adjacent tile growing bamboo of the same colour (as long as they are irrigated).

Takenoko
– Image used with permission of BGG contributor lacxox

Finally, the active player can draw an objective card and add it to their hand;  there is a hand-limit of five and these are the only way to score points.  There are three types of objectives, those related to Plots, the Gardener and the Panda.  Plot objective cards yield points to players when certain plot configurations are irrigated; Gardener cards are achieved when bamboo of given height are grown in the right spaces and points for Panda cards are awarded when a player has managed to encourage the Panda to eat the requisite number of coloured bamboo segments.

Takenoko
– Image used with permission of BGG contributor ObeyMyBrain

When a player completes one of their objectives, they show everyone and the card is placed face up in front of them.  They can complete as many objectives as they like on their turn and end of the game is triggered when one player full-fills a set number of objectives, after which, everyone gets one last turn.  The game was really tight from start to finish and every time one player got a nose in front, the others seemed to catch up and over-take, only to be leap-frogged themselves.  The game finished with just three points separating first and last place, with Burgundy just pipping Indigo.

Lancaster
– Image used with permission of BGG contributor punkin312

While half the group were Playing with Pandas, Green persuaded everyone else to give Lancaster another go.  This is a longer game which embodies a few very clever ideas and that we played for the first time a few weeks ago.  The basics of the game are that players take it in turns to place their knights in the shires, in their castle or send them off to war.  They then vote on and evaluate “the Laws” which give players a benefit.  They then get their their rewards for knight placement.  After five rounds, the player with the most points wins.

Lancaster
– Image used with permission of BGG contributor kilroy_locke

One of the clever things about the knight placement is the way that players can usurp a knight that has already been placed, by supplementing him with a number of squires.  So, a knight of level two can be replaced by a night of level one with two squires.  However, squires are “single use”, so should the original player decide to respond with a level four knight, the other player’s squires are lost.  This is a very clever way of speeding up the bidding.  For example, in Keyflower, two players can keep bidding in increments of one which means it may take several turns for the outcome to be resolved.  In Lancaster, a failed bid that is repeated at a higher level may turn out to be considerably more costly than bidding higher the first time round.  This encourages players to be a smarter about their bidding and changes the dynamics a little too.

Lancaster
– Image used with permission of BGG contributor punkin312

One of the key parts of Lancaster is “the Laws” and managing them.  On our previous play, we didn’t really get to grips with them at all.  Although it is now clear to us how important they are, we are still only just getting to grips with them.  The game starts with a set of three Laws, with three to be voted on during the round.  Since there is a conveyor-belt system, it is possible that some Laws will remain in place for several rounds.  This means even if a particular Law does not reward a player during the round it becomes active, they may benefit in subsequent rounds.

Lancaster
– Image used with permission of BGG contributor kilroy_locke

This game was quite different to the last:  firstly, as a group, we had a better idea of rules, and secondly, there were only three of us compared with five before.  Blue was too busy worrying about the game on the next table to concentrate on the rule-reminder, and paid for it in the first round when her plan relied on the rewards coming before the Laws.  Green tried to increase his force and then generate benefits by fighting the French, however, with fewer players, it is much more difficult to win the battles which means your knights are tied up for a lot longer.  Having screwed up the first round, Blue didn’t bother trying to increase all her knights to full force and tried to be a bit more canny about how she used them instead and pick up upgrades by other means.  Meanwhile, Grey, who had not played the game before, tried to build up his stack of noblemen and played the laws.  Blue and Green were far too bothered with their own games to notice, but Grey managed to get the eight point Law for having three knights in the shires voted in.  More importantly, he managed to keep it there, and this combined with a respectable number of nobles and a few uncontested visits to Somerset (giving him six victory points each time) eventually gave him the game by a sizeable margin from Blue.

Coloretto
– Image used with permission of BGG contributor punkin312

Meanwhile, the Panda Players had finished so Burgundy and Cerise squeezed in a quick two player game of Coloretto.  Cerise and Burgundy had played this last month with Blue and Indigo, but it is not generally thought of as a good two player game.  Nevertheless, they gave it a go and found it much more enjoyable than expected.

Taluva
– Image used with permission of BGG contributor Bizowikc

With Grey and Cerise’s departure, that left just time for one last, shortish game, Taluva. This is a fairly simple tile laying game with a surprising amount of depth.  The idea is that on their turn, players place their tile, then place a building then replenish their hand.  This procedure is to that of Carcassonne, but that is where the comparison ends.  The tiles are a strange dodecagon made of three hexagonal regions or fields, one of which is always a volcano.  When placing tiles, they can be adjacent or on top of other tiles so long as the volcano sits on top of another volcano (the tile must also cover more than one tile and there cannot be an overhang).

Taluva
– Image by BGG contributor Purple

Buildings can be placed anywhere, provided that they obeys certain rules.  Unfortunately, although the game is beautiful, the theme is a bit sparse making these rules appear very arbitrary which has the consequence that they are quite difficult to remember.  A hut can be built on any unoccupied level one terrain that isn’t a volcano.  On the other hand, an existing settlement can be expanded by placing huts on all adjacent terrains of one type, with more huts placed on the higher levels (two on the level two etc.).  There are also three temples and two towers to place which can only be added to existing settlements:  temples must be added to settlements covering at least three fields, while towers must be placed on a level three field adjacent to a settlement of any size.

Taluva
– Image by BGG contributor Moviebuffs

The game ends when there are no tiles left and the winner is the player to have placed the most temples at the end of the game.  In case of a tie, the number of towers built counts and then the number of huts.  However, if a player succeeds in building all buildings from
two out of the three different types before the game end, then he immediately wins the game.  On the other hand, any player who squanders his building pieces and is unable to build any more is immediately eliminated.

Taluva
– Image used with permission of BGG contributor punkin312

We played this a while ago as a two player game, so it was interesting to see how it played with more.  As last time, we had a thorough going through of the rules with all the weird exceptions and special cases (e.g. players cannot build a temple in a settlement that already has one, however, it is OK to join two settlements with temples together; you can place a tile on top of huts, but not towers or temples etc.).  The game was very close and it looked like Blue was going to make it, however, Green and Burgundy ganged up on her and Green managed to sneak the win with the last tile.

Taluva
– Image by BGG contributor Moviebuffs

Learning Outcome:  Two three-player games are sometimes better than one six-player game.

9th September 2014

It was a very quiet night possibly exacerbated by the closure of the A417, which impeded everyone who comes from the south.

Taluva

We started out with a filler game called Taluva.  This is really a thinly veiled abstract, but is very pretty for all that.  On the face of it, it has a lot in common with Carcassone:  players take it in turns to play tiles and then place a meeple.  However, the tiles are twelve sided and comprise three hexagonal regions or fields, one of which is always a volcano.  When placing tiles, they can be adjacent or on top of other tiles so long as the volcano sits on top of another volcano (the tile must also cover more than one tile and there cannot be an overhang).

Taluva

The meeples are the real difference though:  in this game, they represent buildings rather than characters, and the rules for placing them are a bit arbitrary.  Players can place their building anywhere (buildings do not need to be put on the tile they’ve just placed), but the type of building dictates where you can put it and how many you can place.  Thus, a single “hut” can be placed on any level one field (excluding volcanoes) to form a settlement, that is to say, the hut cannot be placed on a tile that sits on other tiles.  On the other hand, an existing settlement can be expanded by adding huts to all adjacent fields of the same type, but in this case, the number of huts added depends on the level.  So, a level two field (i.e. one that sits on top of one other tile) would get two huts and a level three field (one that sits on top of two other tiles) would get three.

Taluva

Each player also has three temples and two towers to place, and these must be placed adjacent to settlement containing at least three huts (and no other temples) and on a level three tile in a settlement of any size respectively.  The game ends when all players but one are eliminated because they are unable to place a building, or when one player wins by exhausting two of their type of building or when there are no tiles left.  In the last case, the winner is the one who placed the most temples, then the most towers and finally the most huts.

Taluva

We started at a leisurely pace before Blue remembered that we should have started with a subset of tiles and then it all became a little more frenetic.  Having played it a few times before, Blue should have had the edge over Green, however it is one of those games that Blue has a bit of a blind spot for.  So although Green felt he was stymied at every turn, he was only ever one or two tiles from taking the lead.  The game finished with Blue and green level on towers and temples, but Blue had placed more huts, so just kept her nose in front.  We concluded that we liked it, though there was nothing in  the theme to assist remembering the rules.  We also thought is would play very differently with more players.

Darjeeling

After much debate (which ended in rolling the dice) we decided to play our “Feature Game”, Darjeeling.  This is a game about collecting and shipping crates of tea.  Each player has a tea-collector meeple which moves around an array of tiles, picking up tea.  When they have a set of complete tea chests, they can choose to ship them.  Bonuses are awarded for shipping larger loads and for shipping the type of tea that is in the greatest demand and the game ends when a player gets to a hundred points.  The demand indicator is very clever – it consists of a double set of wooden disks lined up on a sloping track:  when a tea is shipped the corresponding coloured disk is moved from the bottom to the top and the bonus is awarded according to the number of discs between the two discs of the same colour.  So, if there are two discs of the same colour at the top of at the ramp, shipping that colour will give no bonus.  As other teas are shipped, however, these two discs will gradually move down the ramp together until they are at the bottom when they will give the maximum bonus possible.

Darjeeling

The other clever part of the game is the scoring for shipping:  points are awarded at the beginning of a players round according to the number of crates still on ships multiplied by their position in the boat-stack.  When crates are shipped, they go onto a boat at at the top of the boat-stack, so a boat still at the top of the boat-stack at the start of a players turn will score points equivallent to three times the number of crates on the boat.  When Purple, Black, Blue, Green and Pink played this game a while ago and Green managed to ship six crates and unfortunately nobody was able to ship anything for at least two rounds which meant for a while Green scored eighteen points every time at the start of each of his turn and consequently gave the rest of us a bit of a hiding.  There was no way Blue was going to let that happen again…

Darjeeling

Blue started, but Green was the first to ship with four crates.  Blue followed immediately with four of her own.  Since Green had just shipped, he was not in a position to ship again for a couple of rounds and as soon as he did, Blue shipped again straight away knocking Green off the top spot.  Blue persisted with this strategy for several rounds, shipping immediately after Green even if the timing was suboptimal for her, but preventing Green from building up a commanding lead.  In fact, before long, Blue was building a sizable lead of her own and it wasn’t long before she passed one hundred points, bringing the game to a close.  A couple of poor final moves meant the score was closer than it should have been, but Blue ran out the clear winner.

Darjeeling

We were a bit tired, so we finished off with a game we’ve played before, but haven’t played for a while, Citadels.  The idea of this game is that players are trying to build a city and the game ends when the first player builds their eighth building.  To do this, players choose character cards and  then each character is called in the prearranged order.  Thus, when the late characters are played, the situation may have changed significantly from when they were originally chosen.  On a character’s turn, the active player first takes money or cards, and then (if they can) they build one of the building cards from their hand.  There are bonuses available for players who get one of each building colour, the player who gets to eight buildings first (triggering the end of the game) and any others who finish the game with eight or more buildings.

Citadels

With so few players, we included the Witch and the Wizard from the The Dark City expansion. Blue started quickly and built a valuable purple building, while Green started with cheaper buildings collecting a range of colours.  Blue then built a very cheap red building which Green promptly destroyed using the Warlord.  As the game came to a close, Green had a building of every colour while Blue had more buildings but was missing red and no matter what she did, could not replace the one that got zapped.  Blue finished first with another high scoring purple building and Green finished with the Architect building two buildings to bring him up to eight.  Blue’s valuable buildings and the extras for finishing first offset the bonus points Green picked up for a full set of colours and all eight buildings.  So the game ended thirty-three all.

Citadels

Learning Outcome:  Sometimes games play very differently with the minimum number and maximum number of players possible.