Tag Archives: Wyrmspan

3rd September 2024

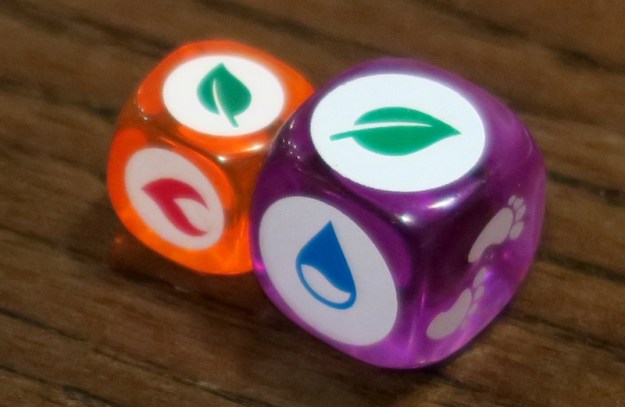
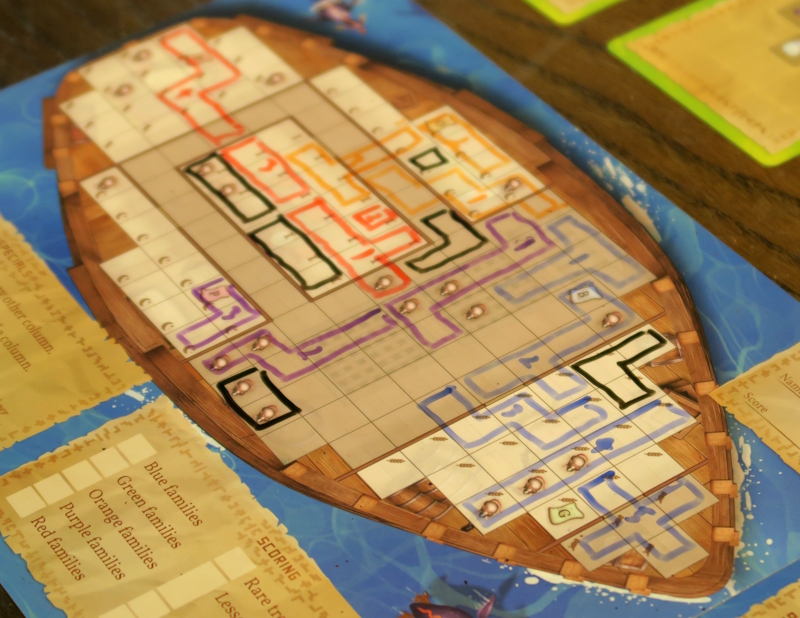
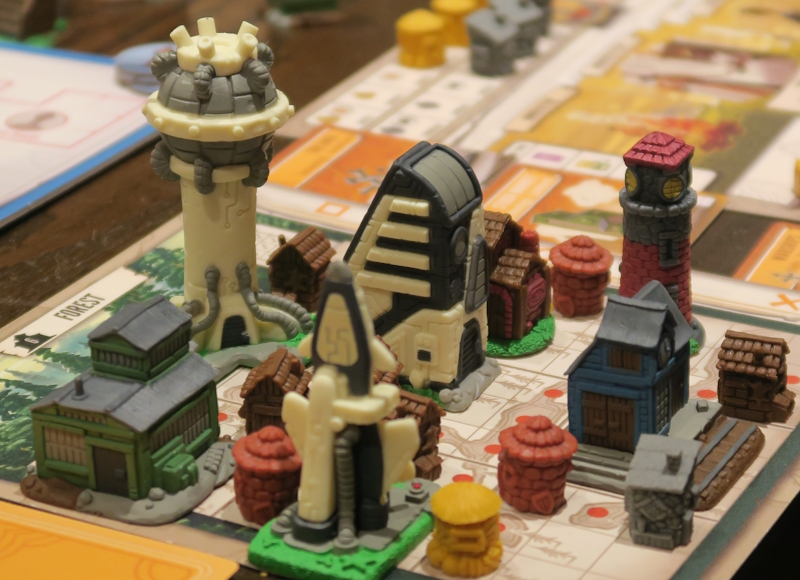
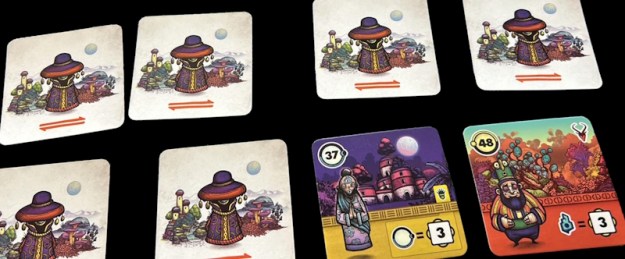
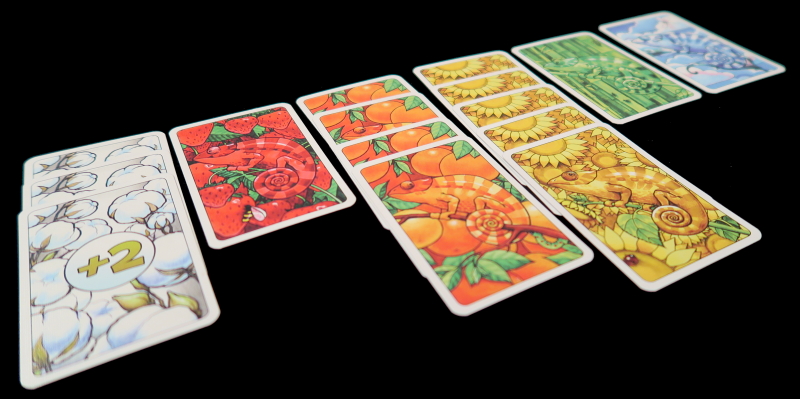
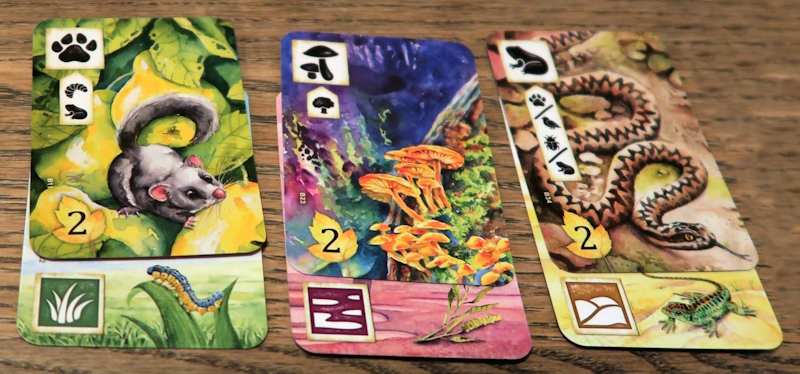
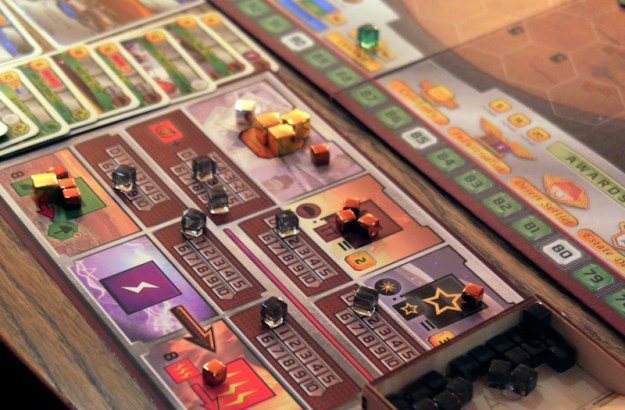
By the time Blue, Purple and Pine arrived, Cobalt was already half-way through a solo game of Isle of Cats: Explore & Draw, a “roll and write” version of the card-drafting, polyomino cat-tile-placing game, Isle of Cats.  In Explore & Draw, instead of drafting cards before choosing tiles, players choose a set of cards each turn and then draw their “discoveries” on their boats.  In this version of the game, players simultaneously choose a column from the Island (the central market) and action all three cards in it in order.  These could be three cards from the Cat deck, two Cat cards and one Lesson card, or two Lesson cards and card from the Cat deck.

Isle of Cats: Explore & Draw
– Image by boardGOATS

Cat cards are polyomino cards, Lesson cards are scoring cards and special Oshax and Treasure cards can be found in both decks.  Cats, Oshax and Treasures are all drawn directly on the boat on the worksheet, while lessons are ticked off and scored at the end of the game.  In the solo game, Cobalt was playing against his “Sister” who reveals a Cat Colour and a Lesson, every round and at the end of the game scores for the different Colours in that order and then the Lessons in turn.  This time cobalt made mincemeat of the Automa beating it by seventy-one points to forty-three.

Isle of Cats: Explore & Draw
– Image by boardGOATS

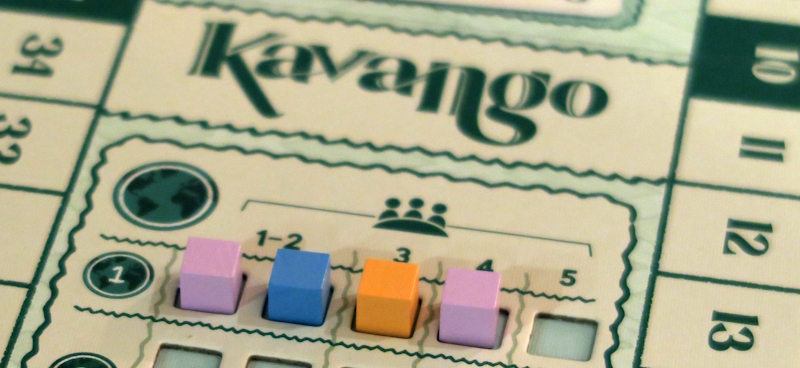
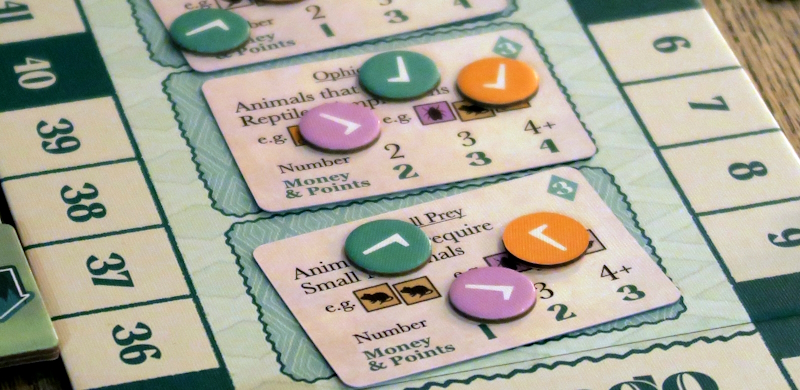
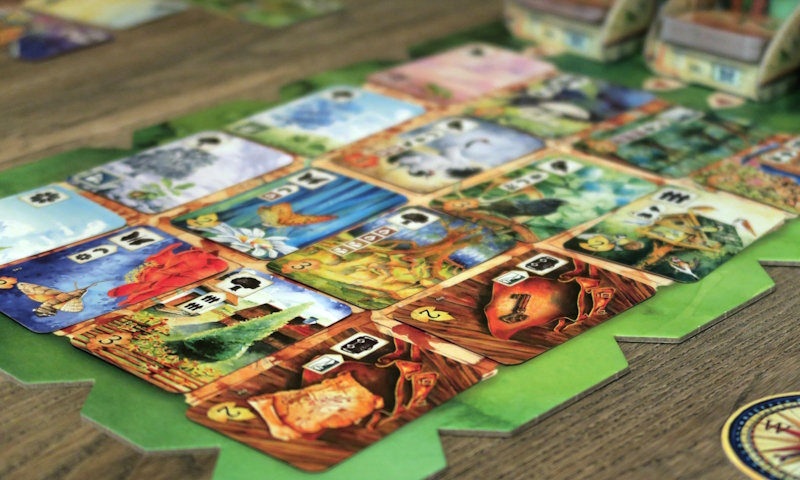
With everyone arrived by this time, it was just the “simple” matter of deciding who was going to play what.  Blue started off leading the “Feature Game“, which was Kavango.  This is a card drafting game where players are building an animal reserve by collecting tags and adding animals to their tableau.  As such, it takes familiar elements from games like Sushi Go!, 7 Wonders, Wingspan, Meadow, Ark Nova and Terraforming Mars, but has a different feel to all of them.  In each round players draft and play ten cards (from an initial hand of twelve), that is to say they choose a card and pass the rest of the cards on to the next player.

Kavango
– Image by boardGOATS

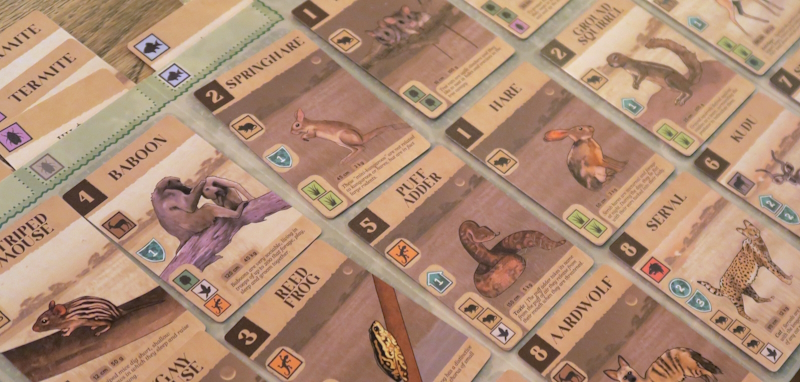
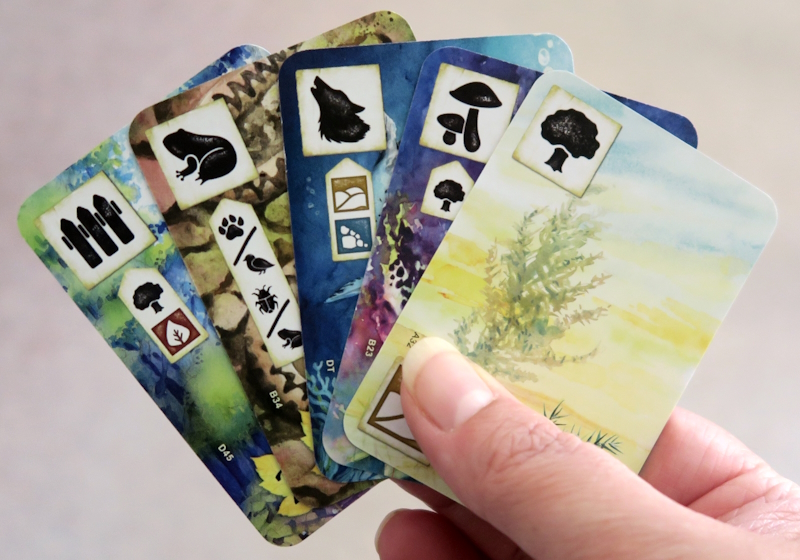
After each card has been chosen, it is added to the player’s tableau.  Then players have the option of claiming money for achieving Research Goals and/or spending money on Poaching, Habitat and Climate protections.  These are required for some of the animals especially the more interesting and lucrative ones.  The clever part about the game is the way the decks progress.  In the first round, the deck is mostly made up of Producers (Grassland, Trees, Invertebrates and Fish) and small animals while the second has mostly medium, but some small and some larger sized animals.  The third and final deck contains almost exclusively larger animals like Zebras, Lions, and Elephants.

Kavango
– Image by boardGOATS

This makes it harder to get Producers in the final round (though it is still possible by paying for Rewilding), but players can often just play cards directly as they already have prerequisites that they acquired earlier in the game.  Throughout, the rules and mechanisms are rooted in reality.  For example, players are responsible for their own Poaching and Habitat protections, but Climate protection is everyone’s concern and players have to work on that together.  Similarly, before a player can have a Puff Adder, for example, they have to have enough small mammals and birds to feed it.  Likewise, if a player wants a White Rhino or an Elephant, they need sufficient Grassland and/or Trees to support them.

Kavango
– Image by boardGOATS

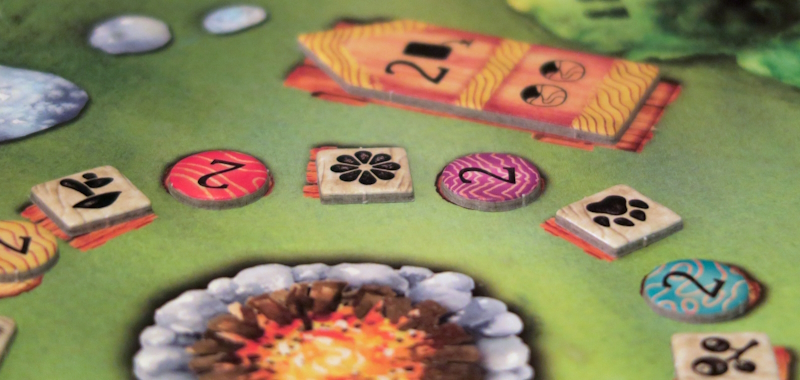
Each round, there are four Research Goals, each with several levels.  The Goals can each only be claimed once, so players generally have the choice of claiming Goals early to get money they can spend straight away, or waiting and getting more money, which may delay progress.  These Research Goals also progress during the game, so early on, they tend to reward players with lots of Producers and Small Mammals etc., while later in the game they reward players with lots of Protections and bigger animals.  At the end of the game, players add bonus points for Biodiversity, Climate Protection and Habitat and Poaching Protection, to the points they got for each animal in their Reserve and the points they acquired during the game for achieving their Research Goals; the player with the most points is the winner.

Kavango
– Image by boardGOATS

Nobody had played the game before, but Indigo had done her homework and had watched the “how-to-play” video, and Blue had done a decent job of reading the rules for a change.  The fact that the rules all made sense helped too, and for the most part everyone had a reasonable handle on what they were trying to do. The first challenge was to try to get all four of the player boards on the table with the score-track/Research board and Climate in the middle.  The boards were so huge that it wasn’t actually possible, so the side of Indigo’s and Navy’s boards were hanging off the edge of the table, and Pines and Blue’s corners were all overlapping or had a flying free-hold.  Still, everyone could just about see what they needed to and could place the cards they had to, and it was all stable so long as nobody moved…

Kavango
– Image by boardGOATS

Pine (the Ecologist), started off really well adding a lot of Small Mammals to his Reserve and achieved early Research Goals as a result.  Early in the game, Indigo (the Investor) started contributing to Climate protection.  Navy (the Botanist) and then Blue (the Researcher) helped her out later in the game, though Pine never had enough money to contribute enough to gain the Climate Protection bonus.  Blue took an early lead in Research Goal points, but Navy soon caught up and by the end of the third round, he had an eight point lead with Indigo holding a three point lead from Pine.  That is only a very small proportion of the points available in the game.

Kavango
– Image by boardGOATS

The Lion’s share of the points come from the animals, including Lions, of course (which Navy had one of).  Pine really struggled in the latter part of the game since he had loads of Small Mammals, but not a lot else. His problems had begun in the second round when he struggled to generate any money as none of the Research Goals fitted after his highly effective first round.  Even so, he still got a over a hundred points for his menagerie and was one measly bird of prey short of getting the Biodiversity Award.  Indigo had a slightly more valuable Reserve, while Blue and Navy tied for the most animal points.

Kavango
– Image by boardGOATS

Indigo, Blue and Navy all picked up the bonus points for Climate Protection, Poacher/Habitat Protection and Biodiversity, which meant that Navy took victory by virtue of his eight point lead from the Research Goal points.  It had been a very enjoyable game though and there was much discussion as the group carefully dismantled the precariously balanced player boards.  Pine took an interest in the other animals in the deck, and there was much hilarity when he found the Sausage Tree—Google convinced him that it was not related to the infamous Spaghetti Tree, and was in fact real.  Nobody could convince him that the fruit wasn’t ideally suited to coaxing Trouser Snakes out of their lair’s though.

Kavango
– Image by boardGOATS

On the next table, Black and Pink were leading a rather ill-fated game of Wyrmspan.  This is a variant of Wingspan with Dragons instead of Birds.  So, like the original, players are playing cards from their hand onto a player board, and activating the habitats in turn. The differences are more than simply cosmetic, however. Firstly, before a Dragon card can be played, it is necessary to explore the cave it will be played in, which involves playing a card (and claiming a Bonus).  In Wingspan, if a player needs a resource, they activate their Woodland habitat and visit the Birdfeeder, claiming the resource they want and a couple of extras, whereas in Wyrmspan, players only get resources one at a time so they don’t have any extras.

Wyrmspan
– Image by boardGOATS

This is critical as “Planting Dragons” requires a lot of Resources and can be difficult to do, so it is important that the Dragon planted is then exploited as much as possible.  Players also need to make the most of the new Dragon Guild.  A step around this Rondel typically gives a Resource as a reward, with a more valuable bonus half-way round and after a full circle.  The distribution of cards is different too:  in Wingspan, the majority of the cards have an effect when the terrain is activate, but in Wyrmspan, these are in the minority with most card effects happening when played or at the end of the round/game.  In Wyrmspan, the rounds are also different.

Wyrmspan
– Image by boardGOATS

Players get a set number of coins at the start of each and an action typically costs one coin.  Some cost more however, and occasionally players can pickup extra coins, which can lead to variable length rounds.  Thus, although Wyrmspan is very definitely Wingspan at its core there are lots of differences.  Blue suggested the group played it, as she had played it with Black and Pink a few months back and they had found it played easily given that they all knew how to play Wingspan.  Thinking Purple, Teal and Lime were also very familiar with Wingspan, Blue rashly assumed it would work, but she underestimated how different it was, how long it was since that last game, and how much longer the game would take with five.

Wyrmspan
– Image by boardGOATS

So, Black patiently explained the rules, while Pink tried to help others muddle through.  Teal focused on simply achieving the end of round goals and “planted” his Dragons accordingly while working on the top row of caves to generate resources—the equivalent of the “woodland”, which works for both Wingspan and for Wyrmspan.  After fighting through one round though, the group agreed to curtail the game after the second round.  In such a short game, the scoring was always going to be skewed, but ultimately the player with the most valuable Dragons, Pink, was the victor, with Teal taking second thanks to him taking the points for winning both the end of round goals.

Wyrmspan
– Image by boardGOATS

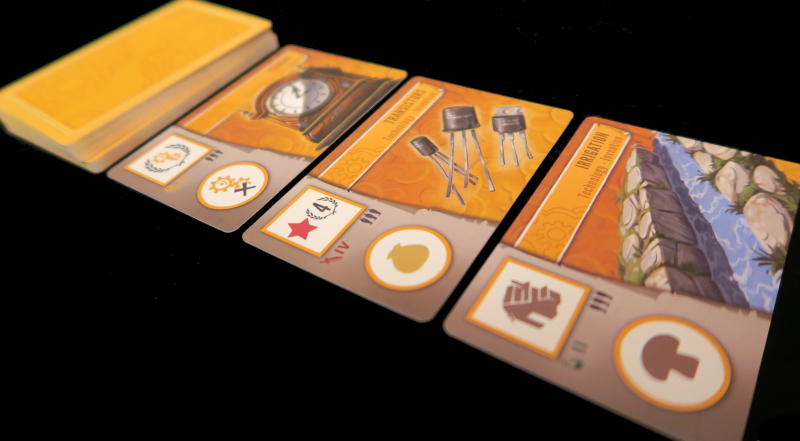
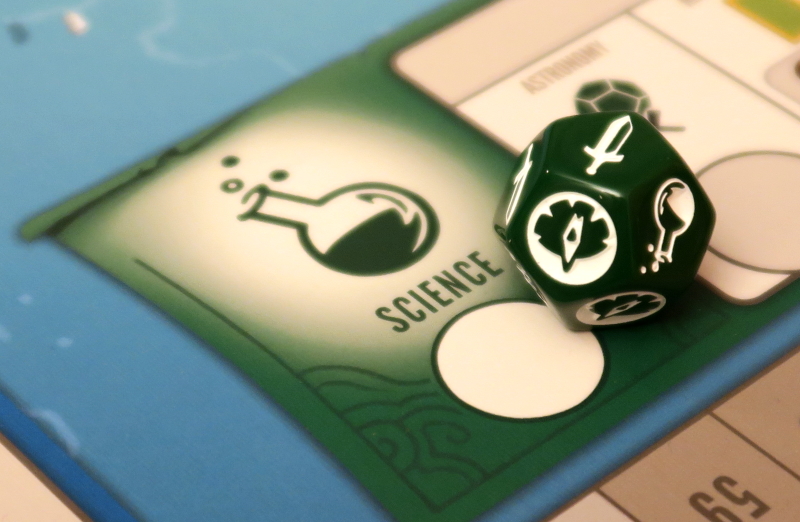
Across the other side of the room, the final game was Tapestry, with the Plans and Ploys expansion.  On the surface, Tapestry has simple mechanisms, but they combine to make a complex game.  On their turn, players move one step along one of the four Civilisation tracks around the board: Science, Exploration, Military, Technology and carry out the action (or actions) associated with it.  Each space requires payment of resources, and the further along the track, the more expensive the spaces become.  If a player cannot afford to pay (or chooses not to), then they instead take income, which gives them more resources.  They also gain points and play a tapestry card, which usually provides a power for the next round.

Tapestry
– Image by boardGOATS

So, at its heart, Tapestry is an engine building and resource management game:  players carry out actions and get resources so they can get more resources and ultimately, points.  The Plans and Ploys expansion mostly just adds more of the same with new Civilisations, Tapestry Cards and space tiles.  The biggest difference is the addition of Landmark Cards which are designed to give each player a personal short-term goal in the first part of the game, in the form of buildings that only they can claim. Everyone was familiar with the game, so the rules explanation was minimal.  Byzantium started (Spies/Grassland) and there was an initial general rush towards the Technology track,

Tapestry
– Image by boardGOATS

Ivory (Islanders/Forest), always one for doing something different, instead went in for Exploration as this linked in with his Civilization.  As the first round went on, Byzantium and Cobalt (Aliens/Tropical) stuck to Technology, whereas Plum (Riverfolk/Wetland) diversified slightly into Science and Exploration. Her primary plan was to exploit her Civilisation and then try to get to six island hexes to trigger her personal bonus Landmark.  Byzantium was first to move to the Income phase, closely followed by Plum and then Cobalt. Ominously, Ivory did what he usually did and managed to stretch my first era out, putting himself in a good position to grab the first Exploration Landmark and also making progress on Military.

Tapestry
– Image by boardGOATS

Byzantium went for Technocracy as his first Tapestry card, sticking with his technology theme. He also managed to grab the first Technology Landmark and completed his Architecture card (appropriately the Game Shop). Plum also went for a Tapestry card, Terraforming, that linked her with her strategy, giving her five points for building on impassable plots, something her Riverfolk Civilization wanted her to do and gave her additional resources of.  Although her alternative Civilisation had looked more interesting, it involved knowing what other people’s options were so she had chosen the simpler Riverfolk and made good use of it.  She was also still fairly diverse in her track focus. Cobalt went for Socialism, to keep pace with Byzantium on the Technology track.

Tapestry: Plans and Ploys
– Image by boardGOATS

Cobalt also gained Landmarks from his Technology cards, helping him build his Skyscraper Architecture card. Having only taken his Income whilst everyone else was half way through their second Era, Ivory could see Cobalt was focusing on Technology, so he used the State Marriage Tapestry card to gain befits on this track whenever Cobalt did.  Having the Military track to himself and a good head start on Exploration, Ivory managed to grab a couple of Landmarks quite quickly. Everyone was also getting Income from buildings on their mats too.  Again, Byzantium Plum and Cobalt all moved into their third Era in quick succession, leaving Ivory half way through his second Era.

Tapestry
– Image by boardGOATS

Cobalt managed to grab the third Era Technology Landmark, but he struggled to fit it on his Capital board and it had to overhang.  At this point, Plum used the Dictator Tapestry Card (with associated comments from Byzantium) to move up the Technology track while restricting everyone else’s progress on the same track for one turn.  Byzantium had been  plotting a move as he was next in line for a Landmark, but Plum’s Dictatorial behaviour only slightly delayed him getting it. This, plus the State Marriage benefited Ivory and competition with Byzantium meant Cobalt used the Militarism Tapestry card to switch his focus to Exploration and Military.

Tapestry: Plans and Ploys
– Image by boardGOATS

Although Cobalt had changed tack to avoid competition with Byzantium, Ivory had a health head-start on both of these tracks, grabbing the Landmarks as he went and also conquering the centre island just before Cobalt could.  To add insult to injury, when Cobalt tried to conquer the island and topple Ivory, he was ready with a Trap card, foiling his plan. Cobalt quickly got revenge paying Ivory back in kind when he tried to do the same thing to one of his territories. However, that wasn’t going to discourage Ivory, and with the Military track encouraging him to conquer, he got the final word in, conquering one of Cobalt’s territories and gaining a double topple bonus.

Tapestry: Plans and Ploys
– Image by boardGOATS

Moving into the final era, again, Ivory was characteristically some way behind everyone else. Byzantium picked up extra resources from the “Age of Wonder” and used these to good effect being the first to reach the end of a track.  Plum, hosted the Olympic Games with her final Tapestry card (and presumably moved to Paris to do so).  This gave her ten points in exchange for a Worker Resource, and additionally a bonus building if any other player took up the offer of doing the same.  Byzantium was the only one who did, as Cobalt wasn’t able to and Ivory had other plans.

Tapestry: Plans and Ploys
– Image by boardGOATS

Cobalt and Plum were both still fairly diverse in their track focus, although Plum had made good progress on the Science track, which was mostly ignored by everyone else.  Byzantium also switched focus to some of the other tracks now he had completed the Technology track. Ivory stuck to Military and Exploration, completing the former (although there was not enough time to gain the second Civilization).  He was sorely tempted by one of his favourite strategies, sending his Meeples into Space by completing the Exploration track, but instead, Ivory switched focus to the other tracks to get as many income buildings in his Capital as possible to maximize the final scoring.

Tapestry: Plans and Ploys
– Image by boardGOATS

Again, everyone finished in quick succession except Ivory, who, as usual, had about five or six turns to go after everyone else had finished.  Plum started with an additional thirty-five points at the beginning of the game thanks to her Riverfolk which gave her points for each territory in her City that had at least two unpassable spaces, but everyone caught up throughout the game. In the end, in Ivory’s final Income round scored him well over fifty points, overtaking everyone and winning and giving him victory.  It had been a good game, enjoyed by all, and although he’d won Ivory hadn’t given everyone as much of a trouncing as he had in the past.  Cobalt felt that the advantages of going first were not mitigated for those going last, so maybe next time that could be used as a slight handicap for Ivory.

Tapestry
– Image by boardGOATS

Learning Outcome:  Animal games are a lot of fun—And that’s not Lion!

16th April 2024

Everyone seemed more keen on standing around and chatting that playing, but eventually, once everyone had arrived, people started dividing up into groups.  Ivory began by leading Jade, Sapphire and Cobalt to the other side of the room to play the “Feature Game“, which was the new “hotness” Let’s Go! To Japan.  In this game, players are travelers planning, then experiencing their own dream holiday in Japan.  Played over thirteen rounds, players draw activity cards place them in different days in their week-long itinerary. These can’t-miss tourist attractions have players traveling between Tokyo and Kyoto as they try to maximize their experience by optimising their activities while balancing resources.

Let's Go! To Japan
– Image by boardGOATS

In each of the thirteen rounds, players draw cards according to the pre-organised sequence.  For example, there are two decks of cards (Tokyo and Kyoto), and for the first four rounds, players take one card from each deck, keep one and add it to their tableau assigning it to one of the days of their dream, then pass the second card to their neighbour.  In the fifth round, players take the four cards they’ve been given and then they place two in their tableau and pass two on, and so on.  Once eighteen cards have been played (three on each of the six days), the game is over and players take their planned trip, activating each of their cards in order, starting on Monday and work their way through to Saturday.

Let's Go! To Japan
– Image by boardGOATS

There is a catch:  where there is a swap between the two decks, players have to move between the cities of Tokyo and Kyoto by playing a Luxury Train Ticket which they can acquire during the game.  Each of these is worth two points.  If players do not have enough tokens to cover each change, they play a Regular Train Ticket from the supply which costs them two points.  Activating cards involves moving the players’ five Experience tokens along a track, increasing or decreasing their Mood, Stress and Happiness, gaining points and then evaluating the requirements for the Highlight of the Day depicted on the final card of the day.  If these requirements have been fulfilled, the player gets bonus points and the player with the most points at the end of the game is the winner.

Let's Go! To Japan
– Image by boardGOATS

The game rattled along very quickly with swift turns and the added bonus that setup was quite rapid too.  As a result, it was easily under forty-five minutes before everyone was explaining their plan and scoring it.  That said it was hard to keep track of what everyone was doing.  Ivory was the first to fill a day and managed to get everything aligned to get the top bonus of a Luxury Train ticket. Although this was very nice, it in no way indicated Ivory was going to get a big score.  Jade and Cobalt quickly followed suit, Cobalt also gaining Luxury Train Tickets (which he got quite a few of throughout the game), and Jade got quite a lot of the second best reward, choosing Wild Tokens that would be really useful at the end of game to ensure meeting Highlight of the Day/End of Game objectives.

Let's Go! To Japan
– Image by boardGOATS

Sapphire was spreading his activities out a little bit more, but as the game went on he also managed to build a large store of wild tokens.  At the start of the game, Jade and Sapphire (who were not sitting next to each other) focused more on Kyoto, whereas Ivory and Cobalt were playing a lot more Tokyo cards.  Inevitably, however,  everyone ended up going to both cities and need Train Tickets as a result. Cobalt and Jade were the only people who choose to grab research tokens; Cobalt used one of these mid-game and managed to manipulate his hand so he ensured he passed nothing of use to Jade, much to his annoyance.  Otherwise, everyone worked on their mental health and managed to keep their stress down scoring positive points for the trip.

Let's Go! To Japan
– Image by boardGOATS

At the end of the game, Sapphire, Jade and Ivory had minimized their travel between the two cities though, whereas Cobalt required a lot of trains:  as he had lots of Luxury Train Tickets he actually increased his score significantly with these.  Jade had not picked up enough Luxury Train Tickets, so was stuck on commuter trains causing him to lose a lot of points. Sapphire ended up with a quick return trip between Kyoto and Tokyo on his last day, but that was acceptable because you should always go out your way for Sake!

Let's Go! To Japan
– Image by boardGOATS

Scoring took longer than usual as everyone gave a detailed description of their trip. Both Cobalt and Sapphire scored well on every day of their trip, with Cobalt slightly ahead thanks to his Luxury Train Tickets.  Sapphire managed to complete all his Highlight of the Day objectives though without using his wild tokens, so he cashed these in at the end of the game to push all his tokens into the next scoring zone and subsequently won the game by two points from Cobalt.  It had been a highly enjoyable experience though, enhanced by the beautiful components, especially the extremely pretty, but totally over the top ceramic component bowls!

Let's Go! To Japan
– Image by boardGOATS

From there, the group then played a game of Faraway, a light game set on the mysterious continent of Alula with its ever-changing geography, shaped after the rhythm of the seasons.  On each turn, players play a card from a hand of three.  As play is simultaneous, players must take into account the priority system in all their choices—being last to pick a card leaves fewer options and often less profitable choices for later turns.  During the game, players will play a row of eight cards in front of them, from left to right. These cards represent the regions they will come across while exploring the lands. Characters on these cards will give victory points if the player later fulfills the conditions they demand.  At the end of the game, players walk back along the same route, scoring cards in the opposite order to that they were played in—and therein lies the heart of the game-play.

Faraway
– Image by boardGOATS

Throughout the game, the cards played serve both to set new objectives, and to meet ones played previously.  This time, Ivory started quickly out of the traps playing the highest card and subsequently getting the last pick in the following round, which was a minor hindrance. As the game went on, the order of picking the cards changed each time and everyone managed to pick first at some point, although it did seem like Sapphire and Ivory had the greatest varieties, mostly either being first or last!  Jade was very quick off the mark getting lots of maps which gave him a significant card advantage throughout the game as he could look at four or five cards and pick the best one. Ivory also didn’t do too badly with maps.

Faraway
– Image by boardGOATS

It eventually became clear that Jade had managed to play his cards in such a way he was always playing a higher card than his last card giving him an additional secondary card, but he was also able to fulfill the requirements to score the objective on that card even though it would need fulfilling earlier in the journey.  Come the end of game scoring and going on their journey, both Cobalt and Ivory had slightly take their eye of the ball and missed fulfilling the requirements of some of their cards and thus missed out on points they though we were going to get. In the end, it was very close for second place Sapphire just taking it, while everyone was thrashed by Jade.

Faraway
– Image by boardGOATS

On the next table, Green was keen to play Lost Ruins of Arnak, and was eventually joined by Black and Plum.  This game combines deck-building and worker placement with resource management.  Players start with six cards in their deck, two Money, two Compasses and two Fear cards, and draw five of these to play.  As in the original deck-builder, Dominion, or in the racing games, Flamme Rouge and Snow Tails, Fear cards clog up players’ decks and more are acquired as the game progresses.  But also as in Dominion, there are ways to “exile” cards during the game.  So, players can try to keep a tight deck with minimal cards, or try to buy lots of cards that work well together.

Lost Ruins of Arnak
– Image by boardGOATS

Players then have two meeples each that can be sent to locations on the map, to either discover or use an action Location.  These generally give Resources plus some additions like draw a card, or gain a Fear card etc.. Each new site also has a Creature guarding it, which, if beaten, will give points and a small one-time bonus.  The Research Track is where players spend three of the resources, Tablets, Arrows and Jewels. Each player has two tokens which move up the same track giving different rewards as it ascends. Thematically, you can’t write stuff in the notebook until you find it with your magnifying glass, so the former can never overtake the latter on the track. And of course, the notebook gives cooler rewards.

Lost Ruins of Arnak
– Image by boardGOATS

Players get one action each per turn, until everyone has passed signalling the end of the round, and the game finishes after five rounds.  At the end of the game, Points are awarded for Cards, for progress on the Research Track, for discovering Locations and for beating Creatures; the player with the most points at the end is the winner.  This time, early in the game, Green pointed out to Plum that she could use an Idol gained by defeating a Guardian to give her the resources she needed to go up the Research Track.  That gave Plum an Assistant and she picked one that turned a Boot into an Arrowhead.

Lost Ruins of Arnak
– Image by boardGOATS

Green bought the card Plum had been eying up, which let players rid themselves of Fear cards (worth minus one point), and therefore seemed like a good use for a Boot/Fear.  It was pointed out later, however, that any card could be used in place of the Boot as all other transport types work for Boot icons.  Plum then got an Assistant that could upgrade a resource, which in practice she used turn Arrowheads into a Rubies as that was all she had by the end of the rounds.  She also managed to get ahead with her Explore magnifying glass token and was the first to a new level on a couple of occasions, which gave her valuable bonuses.

Lost Ruins of Arnak
– Image by boardGOATS

Green picked up a couple of Fear cards from leaving Guardians undefeated; Black got at least one as well, but Plum managed to dodge them.  Both Black and Green got useful Artifact Cards where they could get lots of resources.  It was a little way in that the group noticed the slight Rules Malfunction:  although players were putting their new cards at the bottom of their Draw pile, players were then shuffling the Draw and Discard piles together before drawing new cards.  This gave an extra bit of randomness that this time, worked in Plum’s favour.  For example, she had an item card that gave a Compass per worker when it was played, and it seemed to put in a lot of appearances.  In contrast, all the cards Green had bought didn’t come out until the final round—he got the balance of the bad luck.

Lost Ruins of Arnak
– Image by boardGOATS

Black picked up an Assistant which helped him cycle through his cards which helped mitigate the randomness a little, though there were a couple of occasions when someone took the location he had been working towards. Right at the end of the game, when Plum had managed to reach the top of the Explore/Research Track with her magnifying glass, she was able to use the Icons on her board to get the resources needed to pick up one of the most valuable Temple Tiles—worth eleven points. Green, however, scored almost twice that of the others for his Idols and Black top-scored for his item and artifact cards.

Lost Ruins of Arnak
– Image by boardGOATS

It was the Temple points, together with the extra points Plum got for getting to the top of the Explore/Research Track that ultimately made the difference, giving her a total of sixty-nine points, thirteen more than Green who took second place.  Both Plum and Green had played before, though most of their previous games had been online where the administration of the card shuffling was done for them, hence the Rules Malfunction.  It was Black’s first game, and despite the rules issue and not scoring as well as the other two, he still really enjoyed the game, so there is a good chance it will get another outing in the not too distant future.

Lost Ruins of Arnak
– Image by boardGOATS

Meanwhile, that left six players; Pink was keen to give his favourite panda game another outing, so Pine and Lime joined him in a game of Zoo Break.  This is a cooperative game, where players work together to try to prevent animals escaping from Bedlam Zoo.  On their turn, players roll the die to decide how many Action Points they get, then, after carrying out their turn, flip a Escape Card and a then a Move Card to determine what gets out of its cage and what moves.  Players have to avoid getting trampled on or bitten by the animals, while catching them and then locking them in their cages.

Zoo Break
– Image by boardGOATS

The group started well, or at least it started well from Pink’s perspective when he was cuddled by a Panda (one of his real-life wishes).  However, the game did not go so well.  There are a number of optional variants, and the group had chosen to use the “Faulty Lock” Variant which means that if an escape card is drawn for animals who have already been locked up, the die is rolled to determine whether there are escapees.  This turned out to make things just a bit too difficult and a Coral snake quickly made a bid for freedom, and as it’s a dangerous animal, that was that.  One snake might not seem like much, but there were another five lining up in front of the gate and three tigers too, so it really did not go well.

Zoo Break
– Image by boardGOATS

Reluctant to leave it like that, the trio decided to give it another try, this time without the “Faulty Lock” Variant.  This second try went better, though at one point two elephants got very close to the exit.  The situation was rescued by peanuts which enticed them to the Snack Stall where they were eventually captured.  There was some extensive rules reading to decide whether Pandas were considered “Dangerous” so only one escaping would trigger failure.  The group concluded that Pandas were not Dangerous animals after all though, and four Pandas roaming the streets would not lead to closure of the Zoo (though perhaps the Chinese government would not be appreciative).

Zoo Break
– Image by boardGOATS

In the end, the distinction wasn’t necessary, none of the Pandas got out, though one Capuchin did manage to escape.  That was all, however, and once the group finally rounded up the last of the mad Meercat escapees, the writing was on the wall and the Zoo was saved.  The other games were still underway, so once the charming wooden animals had been tucked away, the trio opted for a couple of rounds of Coloretto.  This is a charming little card game which is the core of the, arguably better known board game, Zooloretto.

Coloretto
– Image by boardGOATS

The game is very simple:  Players either draw a Chameleon card from the deck and add it to one of the Carts, or take the cards on one of the Carts and add them to their tableau, stepping out until everyone else has taken a Cart.  Each Cart has three spaces and players core points for their three largest sets of cards and negative points for any others.  The player with the most points at the end of the round after the trigger card is revealed is the winner.  The clever part is the scoring for sets, which uses the Triangular Number sequence and means that later cards are worth a lot more than the early ones.

Coloretto
– Image by boardGOATS

When the Golden Chameleon card came out, there was some discussion about the difference between it and the multi-coloured Chameleon.  Blue, on the next table was consulted, and explained that it meant the person who takes it gets an extra card drawn from the top of the deck.  With that sorted, the game continued.  The group played two games and both were close, especially between Pine and Pink with Pink just edging it for the first game by two points and Pine just beating Pink by a single point in the second.  Both games were won by Lime, however, and by a larger margin, taking the first by four points and the second by six.

Coloretto
– Image by boardGOATS

The last table included three players, Blue, Purple and Byzantium.  They were the last to start, and were somewhat torn between two of the current hot games in the group, Wyrmspan and Meadow.  After some discussion, the group went for what was probably the easier of the two, and gave Meadow its their outing in three consecutive meetings.  A light to medium card collection game, it was new to both Purple and Byzantium, so Blue explained the rules.  Most of the game is built round a Card Market with players placing an Action Token and taking a card into their hand, before playing a card from their hand.

Meadow
– Image by boardGOATS

This aspect of the game has led to some reviewers comparing the game to Splendor, though there is a lot more to the game than that.  In addition to the Market, there is a second Campfire board, which allows players to carry out special actions, and also claim Bonus points. for cards in their tableau.  The first time the game was played, there was a token included erroneously from the Envelope U mini-expansion, and last time the game got an outing, there was a minor rules malfunction where the four players ended up playing on the three-player board.  So although the game has been played three times in fairly quick succession, this time was the first time the game was played by the rules as written, probably.

Meadow
– Image by boardGOATS

Players start with a hand of cards, including one from the North deck (which is only introduced halfway through the game)—this last card is typically more worth more but is difficult to play, so is a good way to get a steer in the early stages of the game.  As well as the other cards in their starting hand, another key strategy lead is the Bonus points obtained from the Campfire board.  These are obtained by placing a Bonus point token between two Icons, but in order to do so, the player must have those icons in their tableau.  Since each bonus place can only be claimed once, this element of the game is something of a race between those who want to compete for these points.

Meadow
– Image by boardGOATS

This time, the Icons drawn at random and placed round the Campfire included the relatively scarce Cottage, Fence and Garden Bird as well as the Wolf and Hawk which only come out in the second half of the game, when the North deck is introduced.  This made the Bonus points hard to claim. Although neither Blue nor Byzantium appreciated it at the time, although most Wolf cards are in the North deck, this copy of the game included the Seal promo card, which is a Wolf card that hides in the South Deck.  As it was key to getting bonus points, when it came out, both Blue and Byzantium spotted it, but Blue got to it first, and that turned out to be critical to her Bonus point objectives as Byzantium pinched the other spots early.

Meadow
– Image by boardGOATS

Meanwhile, Purple was busy collecting frogs and very effectively daisy-chaining cards to give her points.  As the game moved into its final rounds, Byzantium struggled to get a Landscape card that he could play without needing too many difficult prerequisites.  In spite of the frustrations when players can’t get cards, the game has a nice gentle roll to it and with three players doesn’t outstay its welcome in the way it does with four (when there are two extra rounds).  It was quite a tight game—Purple and Byzanium finished with thirty-seven and thirty-six points respectively from their observations, but Byzantium had more points from his Landscape cards.

Meadow
– Image by boardGOATS

Blue didn’t do as well as them with her observations, but had the most points from her Landscape cards.  Although Purple hadn’t managed to get any Bonus points, both Blue and Byzantium had picked up the full nine giving them a bit of a lead.  In the end, it was the Observations that were key, and they gave Byzantium victory by four points with a total of sixty.  As the Meadows were tidied up, the last of the other games came to a close too and everyone chatted until it was time to go home.

Meadow
– Image by boardGOATS

Learning Outcome:  Every game should come with ceramic component bowls.

20th February 2024

Once everyone had finished eating, we moved on to the usual difficult decision of who was going to play what.  The “Feature Game“, Wyrmspan which is a very new stand-alone game, based on the mechanisms of one of the group’s favourite games, Wingspan, with dragons instead of birds.  It was not as popular as expected, though that was at least partly because it was a relatively quiet night and many of those who would have enjoyed it were away.  In the end, Blue, Black and Pink settled down to play leaving two other groups of three to sort themselves out.

Wyrmspan
– Image by boardGOATS

Wyrmspan is very closely related to Wingspan, though it is less forgiving, that is to say, the consequences of mistakes can be much more severe.  Like Wingspan, players are playing cards from their hand onto a player board, and activating the habitats in turn.  In Wingspan, the cards are Bird cards played in three different habitats, Woodland, Grassland and Wetland, whereas, in Wyrmspan, the cards feature Dragons and they are placed in three different cave networks, the Crimson Cavern, the Golden Grotto, and the Amethyst Abyss.  The differences are more than simply cosmetic, however.  Firstly, before a Dragon card can be played, it is necessary to explore the cave which involves playing a card (and claiming a Bonus).

Wyrmspan
– Image by boardGOATS

This is one way of getting Resources, there are others (playing dragon cards for example as well as activating the Crimson Cavern).  One of the key differences is that these typically provide only one Resource at a time.  So, whereas in Wingspan, if a player needs a resource, they activate their Woodland habitat and visit the Birdfeeder, claiming the resource they want and a couple of extras, in Wyrmspan, they don’t have extras so every move as to be made to count.  And this is all the more critical as “Planting Dragons” requires a lot of Resources and can be difficult to do, so it is important that the Dragon planted is then exploited as much as possible.

Wyrmspan
– Image by boardGOATS

Further, one of the Bonuses is movement on a new, separate board, the Dragon Guild.  A step around this Rondel typically gives a Resource as a reward, and when players reach half-way round and all the way round, they get a more valuable bonus which depends on the Guild in play.  The distribution of cards is very different too, in Wingspan, the majority of the cards have an effect when the terrain is activate, but in Wyrmspan, these are in the minority with most card effect happening when played or at the end of the round/game.  That is not to say they are not important—their very presence enables players to do more when the cave network is activated.

Wyrmspan
– Image by boardGOATS

Further, in Wingspan, players have a fixed number of actions per round (with fewer in the later rounds), whereas, in Wyrmspan, players get a set number of coins at the start of each round and an action typically costs one coin.  Some do cost more though, and occasionally players can pickup extra coins, which leads to variable length rounds.  Thus, although Wyrmspan is very definitely Wingspan at its core (players pay Resources to play cards and then activate habitats) there are lots of differences which give the game a very different feel, and make it a tighter, slightly more challenging game to play.  All that said, there has been a lot of discussion online saying it is much more difficult, but that is not how we found.

Wyrmspan
– Image by boardGOATS

Blue went first and playing a Spirited Hydraptere Dragon in the first round which gave her two extra coins and then she proceed to plan her strategy from there.  Black prioritised progress around the Dragon Guild (Seafarers), which, as that was also high on Blue’s priority list, set them in competition.  Meanwhile, Pink had started with two Hatchlings (Kindly Sea Serpent and Algal Lindworm) which looked like they would synergise well, so he worked towards playing them.  Unfortunately, he came to the conclusion that this was a mistake as it slowed the start of his game and that he would have done better if he had ditched one of them.

Wyrmspan
– Image by boardGOATS

It is interesting to note, that many of the online comments have suggested that Hatchlings come at too heavy a price.  However, discussion after the game suggested that all three players felt they were essential to the “engine” and were worth the effort albeit needing some care to choose the right dragon.  As the game progressed, Black powered round the Dragon Guild with Blue snapping at his heels. Black took the straight six points from under Blue’s nose, so she took a free excavation instead.  Then, towards the end of the game when Blue and Black were heading for their third Dragon Guild bonus Pink grabbed the three point for each completed column and then Black took the straight three point bonus.

Wyrmspan
– Image by boardGOATS

Blue was most unimpressed as between them they had cost her eight points by leaving her with a solitary straight single point, though she picked up a few more from her Tawney Northern Drake (which gave her two points for each marker in the Guild at the end of the game).  Pink did well with his Guild points (despite only placing two tokens), but unfortunately it wasn’t enough.  As well as his points from the Guild, Black had also prioritised the end of round Public Objectives.  In a game with small margins, it looked like this might be enough for victory, however, Blue had a few more eggs, some more valuable Dragons, more tucked Cards and cached Resources.  As a result, she just edged it with eighty-eight points to his eighty.

Wyrmspan
– Image by boardGOATS

Meanwhile, Green who had considered joining the Wyrmspan game, eventually joined Cobalt and Ivory in a three-player game of Terraforming Mars.  This game is quite popular within the group, though it doesn’t get an outing very often.  The game is set in the 2400s, when mankind begins to Terraform the planet Mars. Players take the role of corporations sponsored by the World Government on Earth to initiate huge projects to raise the Temperature, raise the Oxygen level, and increase the Ocean coverage until the environment is habitable.  Victory points that are awarded for contributions to the terraforming, but also for advancing human infrastructure throughout the solar system, and doing other commendable things.

Terraforming Mars
– Image by boardGOATS

The players purchase Project Cards which can give immediate bonuses, as well as increasing production of different resources. Some of the Cards only become playable when the Temperature, Oxygen, or Ocean coverage increases enough. Buying Cards is costly, so there is a balance between buying Cards and actually playing them. There are six different Resources: MegaCredits (money), Steel, Titanium, Plants, Energy, and Heat and players keep track of these on their personal player board. Players compete for the best places to build Cities, place Ocean tiles, and develop Greenery. They also compete for different Milestones and Awards worth many points.

Terraforming Mars
– Image by boardGOATS

At the start of each round (or Generation) players purchase cards from four drawn privately.  Then players take it in turns to carry out one or two actions:  playing a card, claiming a Milestone, funding an Award, using a Standard Project, converting Plants into Greenery tiles, converting Heat into a Temperature increase, or using the action of a Card already in play.  Once all players have passed, players get Resources according to their Terraform rating and production parameters.  When the three global parameters (Temperature, Oxygen, Ocean) have all reached their goal, Terraforming is complete, and the game ends—the winner is the player with the most points.

Terraforming Mars
– Image by boardGOATS

This time, the group played the Elysium map (from the Hellas & Elysium map pack), with the “quick-start” Prelude expansion (but without the Incorporation Cards) and with Card Drafting (after the initial starting hand).  Ivory had the Valley Trust Corporation giving him increased money production which was further increased by his Research Network Prelude Card, ensuring that finance was not going to be a problem for him.  Green had Tharsis Republic, giving him an injection of cash when any city was planned on Mars.  Cobalt had Cheung Shing which gave him a two MegaCredit discount on Building Cards.

Terraforming Mars: Hellas & Elysium
– Image by boardGOATS

Green and Ivory both placed early Cities; Ivory got built the Research Station giving him a discount on all future Cards.  From there, Cobalt and Green then began focusing on Terraforming.  Green used his initial Titanium (from Prelude Cards) to play several powerful Event Cards early on. Cobalt then played several action cards including Regolith Eaters, Aquifer Pumping, Extreme Cold Fungus and CHG Producing Bacteria which he was able to combine together well to climb the Terraforming Track, although Green’s Event Cards meant he was never far behind.

Terraforming Mars: Prelude
– Image by boardGOATS

While Green and Cobalt were busy Terraforming, Ivory focused on getting his Plant production up and running as well as further increasing his money production (partly through building another city on Olympus Mons, refilling his hand). Although the other two had sped ahead on Terraforming, during income everyone was getting similar income thanks to Ivory’s increased money production. However, the other were generating lots of Energy/Heat and getting a lot of other resources.  As a result, Green took the first Temperature Bonus and Cobalt the second.  Turn order meant Cobalt wasn’t able to grab the Oxygen Bonus, which went to Ivory.  The Oceans were complete very early in the game, so there was no third Temperature Bonus.

Terraforming Mars: Hellas & Elysium
– Image by boardGOATS

Ivory’s focus on money production as well as Plant and Micro-cards, allowed him to grab the Specialist and Ecologist awards in one turn.  This forced Green’s hand to take the final milestone, Legend (for playing at least five events). Green then quickly grabbed the Legend award after.  From there, Cobalt continued to focus on Terraforming (particularly Temperature), placing only one City and a handful of Forests, whereas Green and Ivory started placing Greenery tiles. Ivory managed to get to his plant production up to eight, giving him a Greenery tile each round. Ivory and, to a less of extent, Green also started building more Cities.

Terraforming Mars
– Image by boardGOATS

Although this was going to score Ivory a lot of points at the end of the game, each City built was feeding Green’s engine, increasing his money production, quickly getting well into the teens.  From there, the Awards were the focus.  Ivory jumped first for Desert Settler, Green shortly after for Celebrity.  Noting he had very little end-game scoring, Cobalt had to spend 20 MegaCredits to grab the last award, the Industrialist.  All three players scored the maximum five points for each of the Awards they funded.  It then became apparent that the end of the game was approaching:  Ivory’s Greenery tiles were rapidly pushing the Oxygen to its maximum, the Oceans had been completed early by Green and Cobalt and Cobalt had focused on Temperature.

Terraforming Mars
– Image by boardGOATS

Ivory picked up a number of Animal Cards (Livestock and Fish) and focused on getting animals on them while Green’s huge money production allowed him to play a large number of Cards.   It looked like the game was about to end after Generation Seven, but taking that final Award prevented Cobalt from raising the Temperature the final step, forcing one last Generation.  That allowed Ivory to get more Animals and Greenery tiles and Green more cards with points before Cobalt finally triggered the end of the game.  Both Green and Cobalt were way ahead on Terraforming and everyone scored similarly for Milestones and Awards, but Ivory’s Greenery tiles, Cities and Animals got him victory just ahead of Green.

Terraforming Mars: Hellas & Elysium
– Image by boardGOATS

This demonstrated how important it is to develop a really robust engine, which together with some other scoring Resources will generally allow the funding of awards.  It is also key to keep an eye on the milestones and awards, since they can disappear almost instantly before you get the opportunity.  Cobalt had only really played Terraforming Mars solo before this.  In the solo game it is a race to Terraform the planet alone before the clock runs out (fourteen generations with the Prelude expansion).  This requires a very different strategy to multiplayer Terraforming Mars, however, where it is much better to concentrate on a strong plant engine with some cities to add to the score, as demonstrated by Ivory.

Terraforming Mars
– Image by boardGOATS

While Mars was being Terraformed and Wyrms were being “Spanned”, Teal, Purple and Pine were playing Glow, a strange little game which visually inhabits the domain of the graphic novel, the roman graphique, much beloved in France. Ben Basso and Vincent Dutrait’s appealing black and white line art is unique and stylised and sets the tone of gentle strangeness, which contrasts well with the brightly coloured dice and other game elements.  In Cedrik Chaboussit’s Glow, players take the role  of animal leaders recruiting a band of up to eight companions to make a journey to bring shards of light back  to a dark world. The game ends after eight days and the winner is the player with the most Light Shards.

– Image by BGG Contributor Propi

Players start by selecting one Leader Card from a choice of seven and take the accompanying big dice noted on the Card. Dice in the game have elemental symbols on them, Cloud, Water, Leaf, Flame and Gem.  The colour of the die gives an extra face of that coloured symbols, for example, the green die has two Leaf symbols on it.  On day one and every subsequent day players select a Companion Card from the “Meeting Track” (Marketplace) which is refreshed every day with new Cards. Players take the selected Card into their tableau next to their Leader group to form their growing band.  Players also take any small temporary dice that have been placed on the Marketplace card.

– Image by BGG Contributor a2b2c517

Once the recruitment phase is over, players simultaneously roll all their dice. Players can re-roll one or two of their dice if they either play a re-roll token (acquired through in-game actions) or move their scoring track token back to the next re-roll space, effectively losing points for this benefit. The dice results are then used to purchase actions at the base of each character card.  For example two Flame symbols provides three Sparks, or a Gem and a Water symbol provides a re-roll token. Each die can only be used once on each card, but each card can be triggered multiple times if dice are available, and each die can be used on each card if legal.

– Image by BGG Contributor Propi

In addition to scoring point Sparks, players can earn re-roll Tokens, Footprints and Glow-Worms. Unused Feet score one Spark at the end, but have another use in the Journeying phase. If a player has glow-worms equal to or more than their Companions, they receive a ten Spark bonus at the end.  The scoring track surrounds a map of the game world with multiple branching paths. Players start in one corner and in the Journeying phase, attempt to move their band meeple to point-scoring campsites of progressively higher value secured by pitching their tent on scoring spaces. To move along the paths players pay the indicated cost, such as a Leaf symbol, from the revealed symbols in their dice pool. Footprint tokens can be used as jokers to by-pass costs.

Glow
– Image by boardGOATS

At the round end, five new Companion Cards are dealt to the Meeting Track and players give back their temporary small dice by placing them on the matching symbols in the Meeting Track above the Cards. These dice are then taken when the Card is selected in the following round, thus increasing the value of certain Cards.  Although the game phases are played simultaneously after the recruitment phase, this time, Teal, Pine and Purple opted to play sequentially to assist with learning the game.

– Image by BGG Contributor Propi

The complexity of the game comes from selecting Cards from the Meeting Track and weighing up potential Card actions against increasing a player’s dice pool.  Choices include denying opponents Cards, weighing up the cost of re-rolls, planning for action combinations  or focusing more on the Journey board for points.  Pine selected the starting card of Braccio, giving two big green dice, and the action of two leaves providing a Footprint and three Sparks at the game end. During the game Pine got an extra big green dice with a Sketal follower early on to assist with maximising the Braccio special action focussing on Leaf generation for points.

– Image by BGG Contributor rascozion

Purple selected starting card Noctiluca with two big purple dice—the sixth face gives two Footprints and the action of three wild symbols scoring five Sparks. Purple went for a corvid strategy, selecting three crow-like birds.  One of these, Kaar, effectively curses other players dice by locking away from use one symbol per turn if the black die is chosen along with the other dice. Teal selected Tocana, with three big red dice and four Sparks at game end. As the game developed Teal went for a wild symbol strategy and acquired two Torke cards to generate guaranteed points each round, or so he mistakenly thought at the time…

Glow
– Image by boardGOATS

Progress was made on the journey board by all, with Purple and Pine getting to the better quality campsite netting fifteen points each, inspiring reminiscences about woeful tales of camping experiences.  At game end Teal scored a hundred and six, some fifteen ahead of Purple in second place.  Unfortunately, when playing Glow later on BoardGameArena, Teal realised that while the “wild” multi-coloured cost symbols powering actions could represent any symbol, they ALL had to match each other to trigger the benefits.

– Image by BGG Contributor Propi

Because Teal had more of this type of card than other players and acquired them early on, Teal had been unfairly gaining a point advantage by triggering Spark acquisition using mixed symbols.  This explained Teal’s high score and he insisted on being relegated, recording his score as null and void—that left Purple to take the golden crown and Pine the silver medal.  It had been a good game which has lovely presentation with immersive art. There’s lots of risk-reward decision-making, and another game would be great now that the rules are better understood, especially as simultaneous play should reduce playing time to the advertised forty-five minutes.

Glow
– Image by boardGOATS

With both Glow and Wyrmspan finished, there was just time for something quick before home time.  There was some discussion about what to play, but eventually, the player count of six and the short time available fixed the decision as the old favourite, No Thanks!.  This is a very simple “push-your-luck” game where players take it in turns to choose whether to take the face-up Card, or pay a Chip to pass the problem on to the next player.  At the end of the game, players add up the face value of their cards and subtract the number of Chips to give them a total—the player with the smallest total is the winner.

No Thanks!
– Image by boardGOATS

There are two additional rules that make the game work: firstly, if a player has a run of Cards with consecutive numbers, they only count the lowest number.  This is tensioned by the second rule, which is that roughly one third of the Cards are removed from the deck at random before the start.  This means players have to gamble on whether a card in a run is still available and it can make things go very wrong for people.  This time, it went very wrong for Blue who finished with forty-eight and for Black who top scored with a massive one hundred and twelve!  The winner, with a very reasonable twelve, however, was Pink, two ahead of Pine who finished with fourteen.

No Thanks!
– Image by boardGOATS

Learning Outcome:  Wyrms are more challenging to handle than Birds.