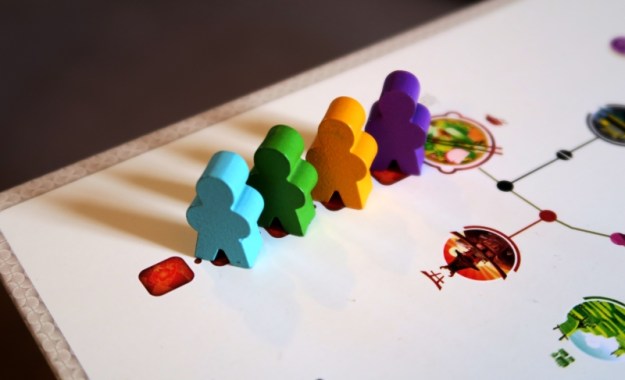
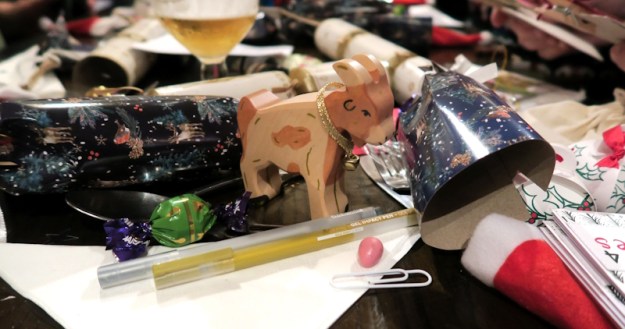
The evening began with a little play-testing while people waited for their food to arrive. The two-player game currently goes by the name of Brain Grabbers and, though simpler, has a mechanistic similarity to Sprawlopolis or Honshū. The game was designed by one of Pink’s work colleagues, so Pink explained the rules, and then proceeded to lose, first to Blue, then to Pine, failing to take a single point to their combined total of fourteen. The consensus was that it could be successful as a family-level game, but we weren’t fans of Cthulhu, so spent the next ten minutes coming up with exciting ways to re-theme it.
 |
| – Image by boardGOATS |
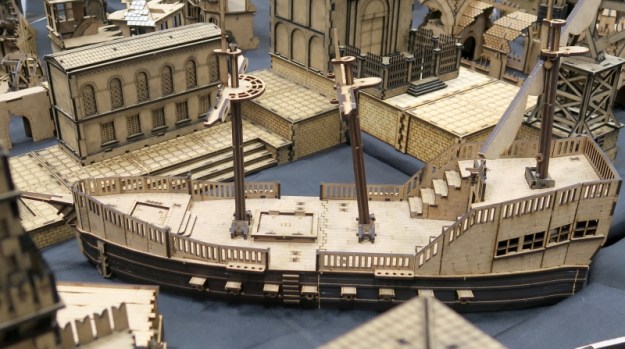
As people finished eating others began to arrive, though there was some question about whether Purple and Black would make it thanks to a serious accident on the A420. We were discussing the treacherous nature of the A420 and its accident black spots when Purple and Black rocked up, and Purple surprised everyone by joining Green, Ivory and Burgundy to play the “Feature Game“, Endeavor: Age of Sail with the extras from the new Age of Expansion. Endeavor is a game we have played quite a bit over the years, initially in it’s original form and, more recently, in the new edition. The expansion came out last year and, sadly, got lost in the mists of the endless “Roll and Write” games we were playing online.
 |
| – Image by boardGOATS |
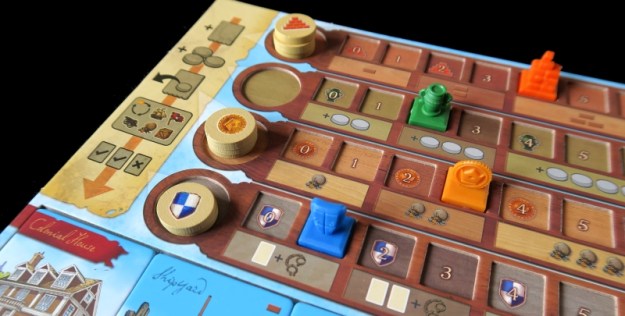
The original game is actually not terribly complicated and during play is almost completely luck-free—all the variation is in the set up. The game is played over eight rounds, each consisting of four basic phases: Build, Populate, Payment and Action. There are four technology tracks roughly corresponding to each phase, which dictate what a player can do during that phase. For example, how far along the building track a player is dictates what they can build: the further along they are, the more buildings they have to choose from.
 |
| – Image by boardGOATS |
Similarly, a player who is further along the population (or culture) track, can move more people into their harbour for use in the Action phase. Payment also increases the number of people available as it moves population markers from the action spaces into the harbour. More importantly, however, it makes the action spaces available again for use later in the round. The first phase consists of passing round the tray of buildings rather like a box of chocolates although in truth, at this point of the game players have very little choice. Despite that, the decision is crucial to how players do.
 |
| – Image by boardGOATS |
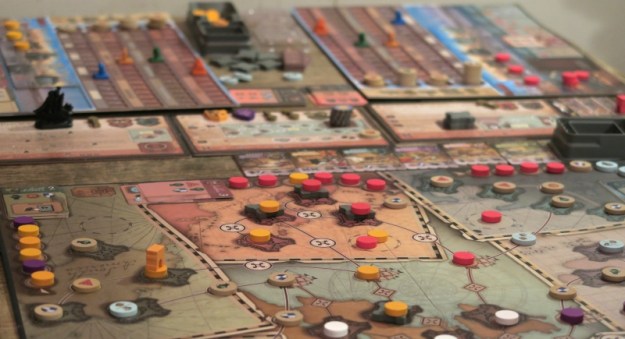
After the Building phase, the second and third phases (Population and Payment) are more or less carried out simultaneously. The guts of the game, however, is the Action phase, when players can place population markers on their buildings to activate them and carry out one of the five actions: Colonise, Ship, Attack, Plunder Assets, and Pay Workers. The actions are generally based round the central board which is divided up into seven regions representing the seven continents. Each continent comprises several cities, a shipping route and a deck of cards.
 |
| – Image by boardGOATS |
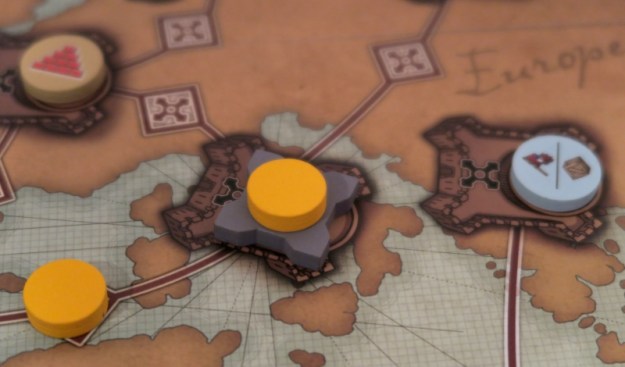
At the start of the game there is a Trade token on each city and each shipping space, but also on many of the connections between cities (these are taken if a player occupies both cities either side). Players cannot Colonise a city until they have a presence in a region, which they can do by Shipping. In this case, they activate their building that provides the shipping action by placing one population marker on it, then place a second population marker on the shipping track. Thus, players need to have two markers available to be able to Ship.
 |
| – Image by boardGOATS |
The second population marker is placed in the furthest unoccupied space from the deck of Asset cards in the region of their choice, and the player takes the Trade token on that space. Most trade tokens add to one of the four technology tracks, though a small number provide one off actions instead. Players also need two population markers to Colonise (one for the action and one to occupy the city) and three if they are going to attack an already occupied city (one is collateral damage). Once a player has a presence in a region they can take an Asset card, so long as the number of the top card is not higher than the number of population markers that player has in the region.
 |
| – Image by boardGOATS |
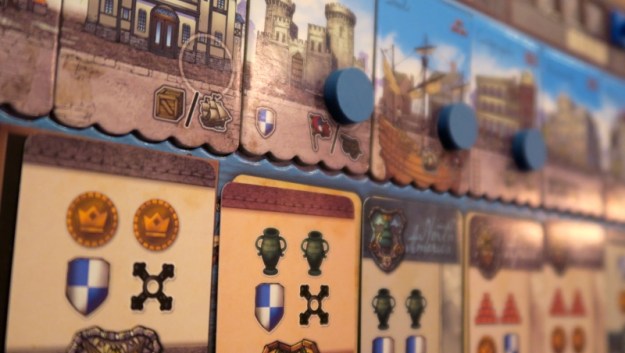
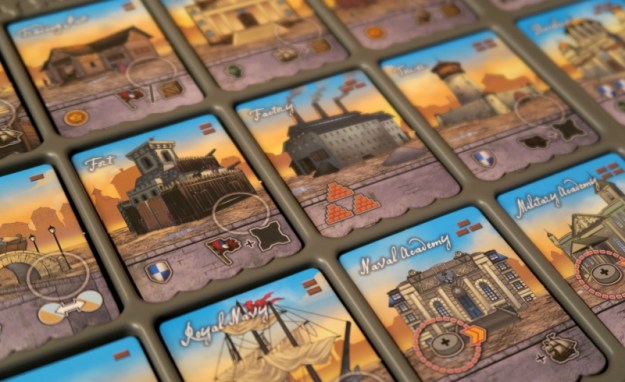
After eight rounds, players add up scores for each track and for the cities they control and the player with the most points is the winner. The new Age of Expansion adds several new components that completely mix up the game. First there is a completely new set of buildings, many of which have actions as well as boosting the players’ economies while others have more choice. Similarly, the first, second and fifth cards in the region decks now have more powerful and unique cards. These are now more desirable creating more competition for them.
 |
| – Image by boardGOATS |
The new buildings also introduce three new concepts: Trade, Fortify, and Conscription & Mobilisation. Trade allows players to swap one Trade token from their play area with one on the central board, while Fortify allows players to increase the protection in a city they occupy causing others to lose an extra casualty should they decide to attack. Conscription enables players to acquire extra population which can then only be Mobilised as part of an action that has been activated in the usual way (e.g. used as a casualty during an attack, or to Settle).
 |
| – Image by boardGOATS |
Additionally, a single Prominence tile drawn at random can be added to the game. These provide players with new ways to gain presence in a more-competitive Europe and each one provides difference benefits and ways to score. This time the Prominence tile was “Changing Alliances” which allows players to set up an alliance, where players cannot attack each other within Europe, in exchange for points at the end of the game.
 |
| – Image by boardGOATS |
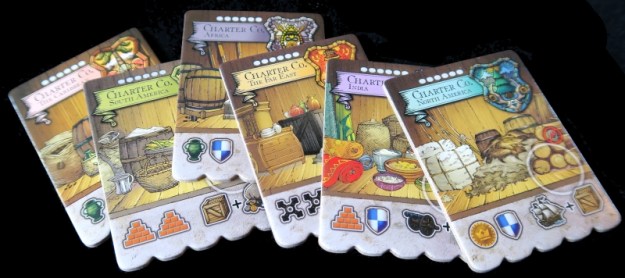
The game took a little while to set up, and although everyone had played it before, we needed a refresher of the rules and run down of the new expansions. In addition to the new Age of Expansion updates, the group also included the Exploits from the original Age of Sail, the mini Charter Company buildings and two additional micro-expansions from Age of Expansion (Seize your Fate & Level 6 region cards), making it a mega-game. Overall, it took about an hour for set-up and rules explanations.
 |
| – Image by boardGOATS |
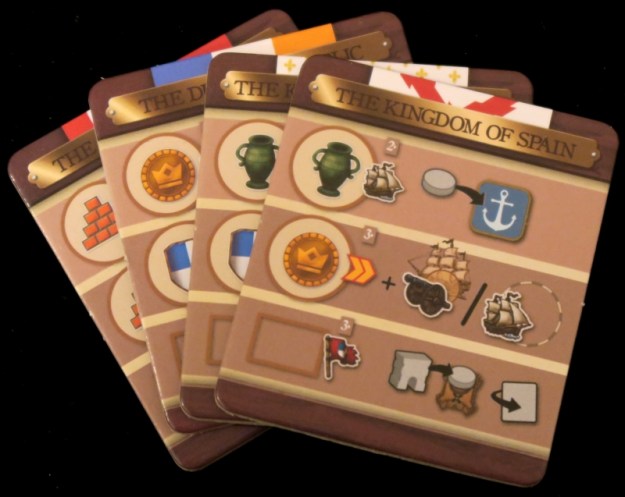
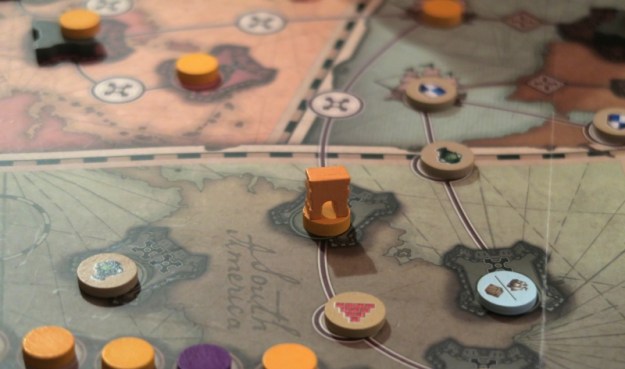
The Seize your Fate Expansion provides each player with a unique starting set-up. Ivory was The Kingdom of France so started with a city in Europe; Purple was The Ottoman Empire, so started in the open sea of India; Green was The Kingdom of Spain so started with a city in South America; Burgundy was Great Britain and started in the open seas of North America and the Caribbean. Coincidentally, each player was sat near the part of the board where their starting places were, so that set the stage for players’ strategies.
 |
| – Image by boardGOATS |
Ivory quickly started taking cities in Europe and was open to a Prominence Alliance. Green was taking Fleets in Europe so joined him. No-one else wanted to form any alliances leaving Ivory to dominate Europe with and Green (to a lesser extent). However, due to a rules malfunction, this was under the false impression that as part of the winning alliance they would score four points for each disc in the region when it was actually four points for each disc in the Alliance. Since he was concentrating on becoming the power house in Europe Ivory left his Seize the Fate actions for much later in the game, and only expanded out of Europe to the Far East and later on Africa.
 |
| – Image by boardGOATS |
He did however make good use of the Dutch East India Company exploit (once it was open) to upgrade his seaside buildings. Meanwhile, Purple concentrated mostly on India and Africa, but suffered early on with not having enough population in her harbour or enough bricks to build better buildings. The game was long though, and she managed to Seize her Fate (Round the Cape). She also made use of the Dutch East India company in the latter rounds, and although scores weren’t calculated until the end of the game, she probably made up good ground with these latter stages.
 |
| – Image by boardGOATS |
Elsewhere, Green was concentrating on the Caribbean, and making connections with his Fleets in Europe. He managed to amass a large population early on, but let it slip so that by the end of the game, Ivory and Burgundy had much more population to spare for attacks, even on fortified cities. Green kept an eye on Burgundy’s progress to keep a presence in South and North America. He was the first to Seize his Fate (Form the Great Armada) and used The Transit of Venus exploit, shipping up to Tahiti and using his money to increase his population.
 |
| – Image by boardGOATS |
Burgundy concentrated on the America’s, and although he opened the Republic of the Pirates exploit, he never used it (and neither did Green who could also have done so). This was because he said he did not really understand it and it didn’t seem that useful. Which was a shame, as it meant the beautifully crafted big black plastic pirate ship didn’t make it onto the board. What Burgundy did do, however, was to make heavy use of Conscription buildings, which really helped him ship to almost everywhere. Unfortunately for him, in the final round of the game there was no shipping left and he discovered that he didn’t have enough other actions to make use of the population he had.
 |
| – Image by boardGOATS |
In the end, after a re-evaluation of the scores due to the Alliance misunderstanding, Ivory was declared the winner with eighty-one. Burgundy was the runner-up with seventy-three, three points ahead of Green in what turned out reasonably close game. But what of all the expansions? The exploits can always be relied on to add an interesting dynamic (with a couple of duds) and it is likely these will continue to feature. The Charter companies seem to help in four and five-player games when Level five buildings have the potential to disappear quickly (especially with the Exploit we used this time), and apart from space around the board don’t intrude too much anyway.
 |
| – Image by boardGOATS |
The Level six cards seem to be intended to be played with the Age of Expansion every time, as Slavery is Abolished on the Europe Level 6 card, whereas in the Age of Sail base game it is abolished on the Europe Level five card. This time, none of the Level six cards actually got played. Again, they don’t intrude, but give additional options, so are also worth playing with. The benefits of the “Seize your Fate” was perhaps less clear. Having different starting positions certainly helped the start and gave players a steer as to strategy. Remembering the actions were available was a problem and the extra scores were quite small (about four points for those who used them). Including this module would probably depend on the group.
 |
| – Image by boardGOATS |
The new Conscription action seemed to open up more of the board, which counters a common complaint about the game, that in order to get a region open, players have to neglect a couple of other areas and can lose out if they made a start in them early in the game. However, the danger seems to be in overusing Conscription. In this game there was a lot of Fortification, and in many ways it seemed a little too much. The bonuses on the new cards were interesting and add variety to the main game, but the expansion certainly doesn’t make the Age of Sail options obsolete as they could be very valuable if a less competitive game was wanted.
 |
| – Image by boardGOATS |
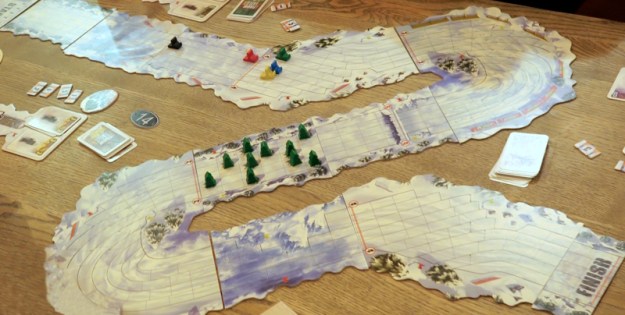
While Purple was exploring India and Africa, Black, Pine, Lime, Blue and Pink were exploring Japan with Tokaido. This is a highly tactical game, that straightens out the market mechanism at the heart of Glen More and makes it the centre of a set collecting game. During the game, players are travelling from the ancient capital Kyoto, to Edo (now Tokyo) via the Tōkaidō road. This was one of the five centrally administered routes, the Gokaidō, that connected the capital of Japan with the outer provinces during the Edo period (1603–1868).
 |
| – Image by boardGOATS |
As players travel, they experience the wonders of Japan sampling food and scenery, talking to the colourful characters en route, buying souvenirs and giving thanks at the temples they pass. The game board consists of a long track with locations marked—each location can only be visited by one player. Players line up along the path and the player at the back goes first (in this case Pink). They move their piece to an empty space and carry out the associated action, before the next player at the rear takes their turn.
 |
| – Image by boardGOATS |
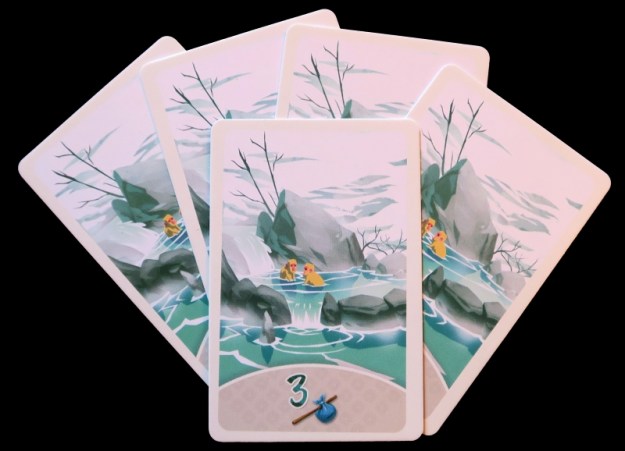
In each case, the primary decision is simple: move to the space with the most interesting action to maximise points, or move to the first available space to get the most turns. In most cases, once that decision has been made, players simply take money or a card from the appropriate pile, the three panoramas, the hot springs, or Characters. Panoramas and Hot Springs simply give points while Characters give other bonuses. Stopping at a temple allows players to genuflect and pay tribute, while visiting a Village gives player the opportunity to buy souvenirs. Both of these cost money, however.
 |
| – Image by boardGOATS |
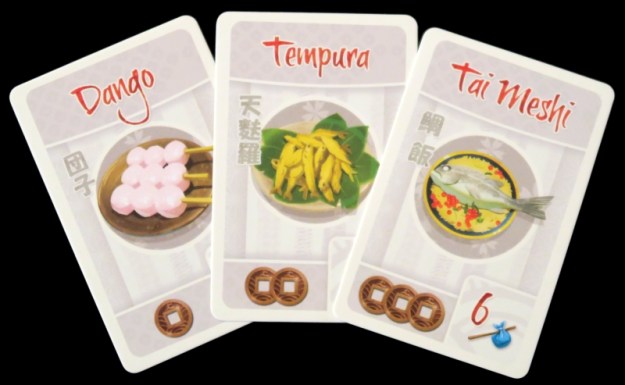
Money is really tight and there are few chances to get more, and an important source of points is sampling the varied food, but food can be expensive. There are four stops to eat and players have to stop and wait at these. The first person to arrive gets to choose their meal from a handful of cards—they do not have to buy food, if they choose not to or cannot afford it, but each meal is worth six points at the end of the game. Food comes at different prices though, so arriving early means players get to choose a cheaper meal. Each meal a player takes must be different, however, so waiting to the end can end up being costly, either financially, or in points lost.
 |
| – Image by boardGOATS |
At the end of the game, there are bonus points for almost everything: the player who donated most to the temples, the player who spent the most on food, the player who completed each of the panoramas first, and the players who visited the most Hot Springs, met the most visitors and bought the most souvenirs. The player with the most points at the end is deemed to have had the best journey and wins.
 |
| – Image by boardGOATS |
Players start by choosing their character from a pair drawn at random. Blue was Kinto, Lime was Hirotata, Pink was Zen-emon, Pine was Mitsukuni and Black was Umegae. Each of these gave a special power, for example, picking Kinto meant Blue paid one Ryō less for food each time she stopped to eat. Similarly, every time Lime stopped to pay tribute at a temple, he was able to donate an extra Ryō, taking it from the main supply scoring an extra point straight way, and putting him in pole position for picking up the ten point bonus for being the most devout.
 |
| – Image by boardGOATS |
The special powers aren’t all financial though—Mitsukuni gives an extra point at the end of the game for every end-game bonus the player wins. Most of them do involve money on some level though even if it is not directly. Zen-emon’s special power, for example, activated when Pink visited a Village to buy souvenirs. When buying souvenirs, the active player draws three souvenir cards and can choose to buy one, two or all three. Whenever Pink bought one souvenir, Zen-emon enabled him to buy one souvenir for one Ryō (regardless of its marked price) and as many others as he wished at full price.
 |
| – Image by boardGOATS |
Souvenirs are a great way to get points. They come in different types and players are collecting mixed sets with the first card in a set being worth one point, but later being worth more—a full set gives sixteen points. The special powers give players a steer as to which strategies might be beneficial. To take advantage of Zen-emon’s special power, Pink needed to visit the Village as often as possible, however, there were two problems: firstly, souvenirs are expensive, and secondly Pine kept getting there first.
 |
| – Image by boardGOATS |
Pine got extremely lucky on his card draws when he visited the Villages too, picking up lots of cheap souvenirs and getting lots of points in return. As if that wasn’t enough, Pine seemed to be able to harness his “inner Burgundy” and every time he visited the Hot Springs, he found monkeys and with them an extra point. To rub salt in Pink’s wounds, he ran out of cash and found he couldn’t afford to eat, and thus he haemorrhaged points.
 |
| – Image by boardGOATS |
Meanwhile, Black as Umegae, kept meeting people and every time he did so he gained an extra point and a Ryō. This occasional top-up of cash meant he wasn’t as strapped as everyone else, but further, the New Encounter mini-expansion Cards were also included in the deck, and some of these are quite powerful. Pine picked up Itamae, the especially powerful itinerant cook (who cooked him an extra meal for just one Ryō), but Black took Takuhatsuso, for example, the old priest who gave him four points in exchange for just one Ryō.
 |
| – Image by boardGOATS |
As the players approached Edo, Pine was way out in front, though Black and Blue (thanks to spending a lot of time admiring the views) were not far behind. There were a lot of points available from the bonuses though and it wasn’t a forgone conclusion by any means. Lime took the ten point temple bonus, but it wasn’t really enough. Black finished one point behind Blue, until the recount when Black finished one point ahead. That was just enough to give Black second place, but Pine picked up enough bonuses and with the extras provided by Mitsukuni he finished seven points clear.
 |
| – Image by boardGOATS |
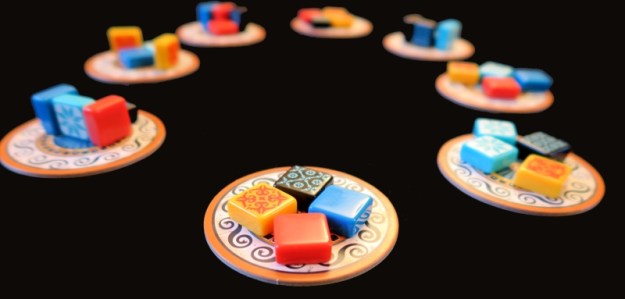
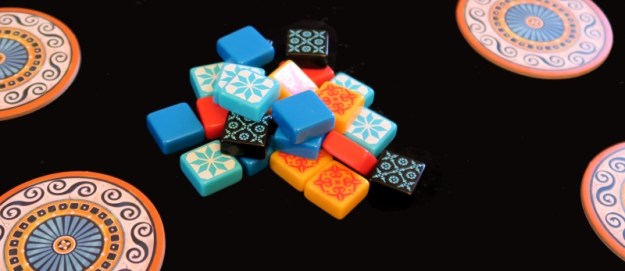
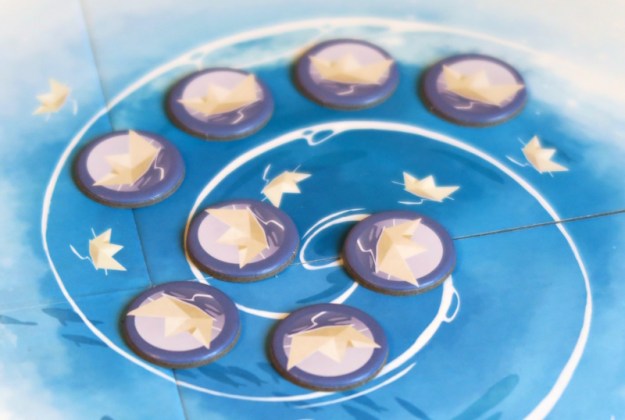
Pine and Lime went for an early night, but Endeavor was still going so Black had to wait for Purple which meant a game of Azul with Blue and Pink. We’ve played this a lot within the group, but having effectively had over a year off has rejuvenated many of our old favourites. The series of games use a very simple, but very clever market mechanic where players take all the tiles of one colour from a market and put the rest into a the centre, or take all the tiles of one colour from the centre. The three different games, Azul, Stained Glass of Sintra, and Summer Pavilion, all differ in what players do with the tiles once they’ve taken them.
 |
| – Image by boardGOATS |
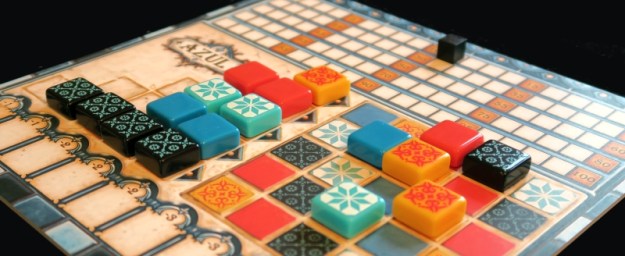
In the original Azul, as soon as they have taken the tiles, players add them to one of the rows on their player board. At the end of the round, one tile in each full row is moved into their mosaic. The game ends when one player completes one full row of their mosaic. Players score points when they add tiles to their mosaic (one point for each tile in the row and column it forms), and receive bonuses for completed rows, columns and any completed sets in their mosaic. The catch is that each feeder row can only contain one colour and and if there are left-overs when they add to it, these score negative points. Further, each row in a player’s mosaic can only have one tile of each colour.
 |
| – Image by boardGOATS |
And that was where Pink got caught, first with seven negative points taking him to zero and then a massive eleven negative points. Black and Blue managed to avoid that pitfall though and the game was progressing well when suddenly, Blue brought it to an abrupt end by completing two rows. Black failed to spot it was on the cards because Blue’s finished rows, were the second and third, rather than the easier first row. Inevitably, having his game cut short stymied him somewhat, and Blue’s final score of a nice round hundred put her some way ahead of the others.
 |
| – Image by boardGOATS |
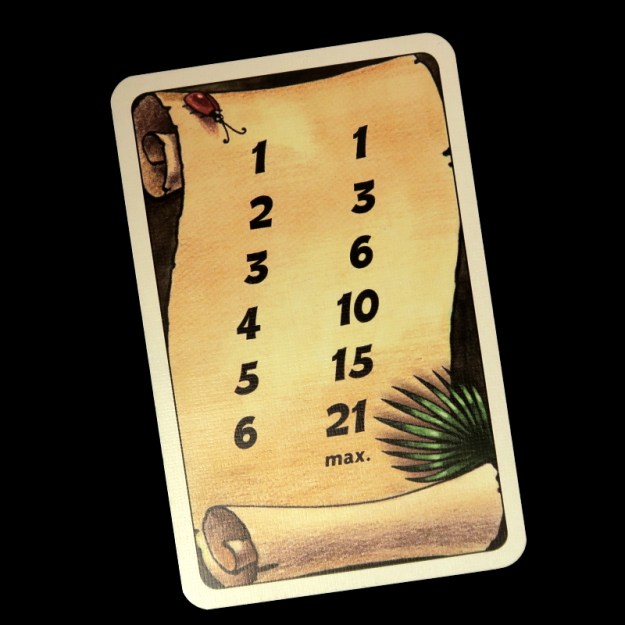
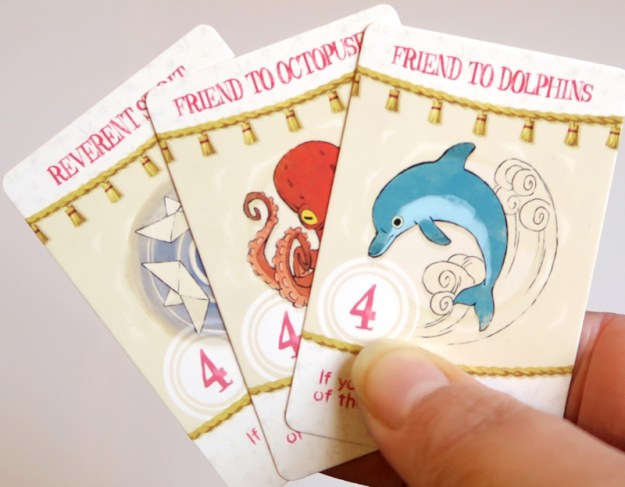
Endeavor was coming to a close, but there was just time for one final quick game while they finished up. The game the trio settled on was Coloretto, the cute chameleon collecting game that provides the core mechanism that underpins the better known game, Zooloretto. This is really a really simple game: on their turn, players either draw the top chameleon card from the deck and add it to a truck, or take a truck. The aim of the game is to collect sets of one colour, but only the largest three sets give positive scores, while the others score negatively. The clever part is the set scoring, which uses the Triangular Number Series.
 |
| – Image by boardGOATS |
Each additional card in a set is worth one more than the last card added with the first worth a single point, but the card that completes the set is worth six points. As usual, there was stiff competition for the multicoloured chameleon cards, but also for the bonus point cards. Blue went from “Azul Hero” to “Coloretto Zero” picking up too many cards of in too many different colours early on. It was closer between Pink and Black, though Pink’s large collection of orange cards made the difference giving him victory by eight points. And with Endeavor finally packed away, the evening came to a close.
 |
| – Image by boardGOATS |
Learning Outcome: Don’t spend all your money in the souvenir shop – food is important too.


/pic372691.jpg)


